
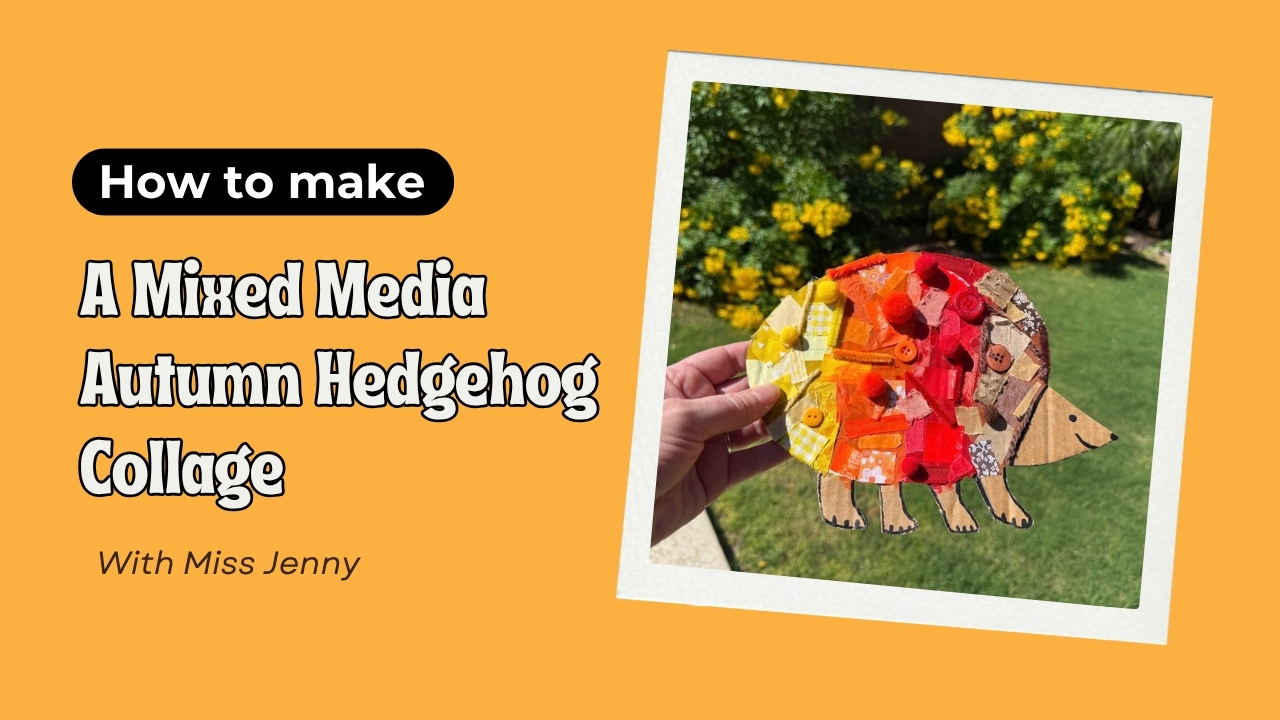
For our next Art Class with Miss Jenny project, we are turning a simple cardboard silhouette into a colorful, textured autumn hedgehog.
This mixed-media activity combines painting, color matching, nature, texture, and three-dimensional collage. Students will use a warm palette of yellow, orange, red, and brown before adding leaves, sticks, yarn, fabric, buttons, pom-poms, and other materials to create the hedgehog’s spines.
Although everyone begins with the same basic shape and color palette, every finished hedgehog will look completely different. This makes the project a great fit for our mixed-age group. Younger children can focus on matching colors and exploring textures, while older students can create more intentional patterns, gradients, and layered compositions.
What Is a Hedgehog?
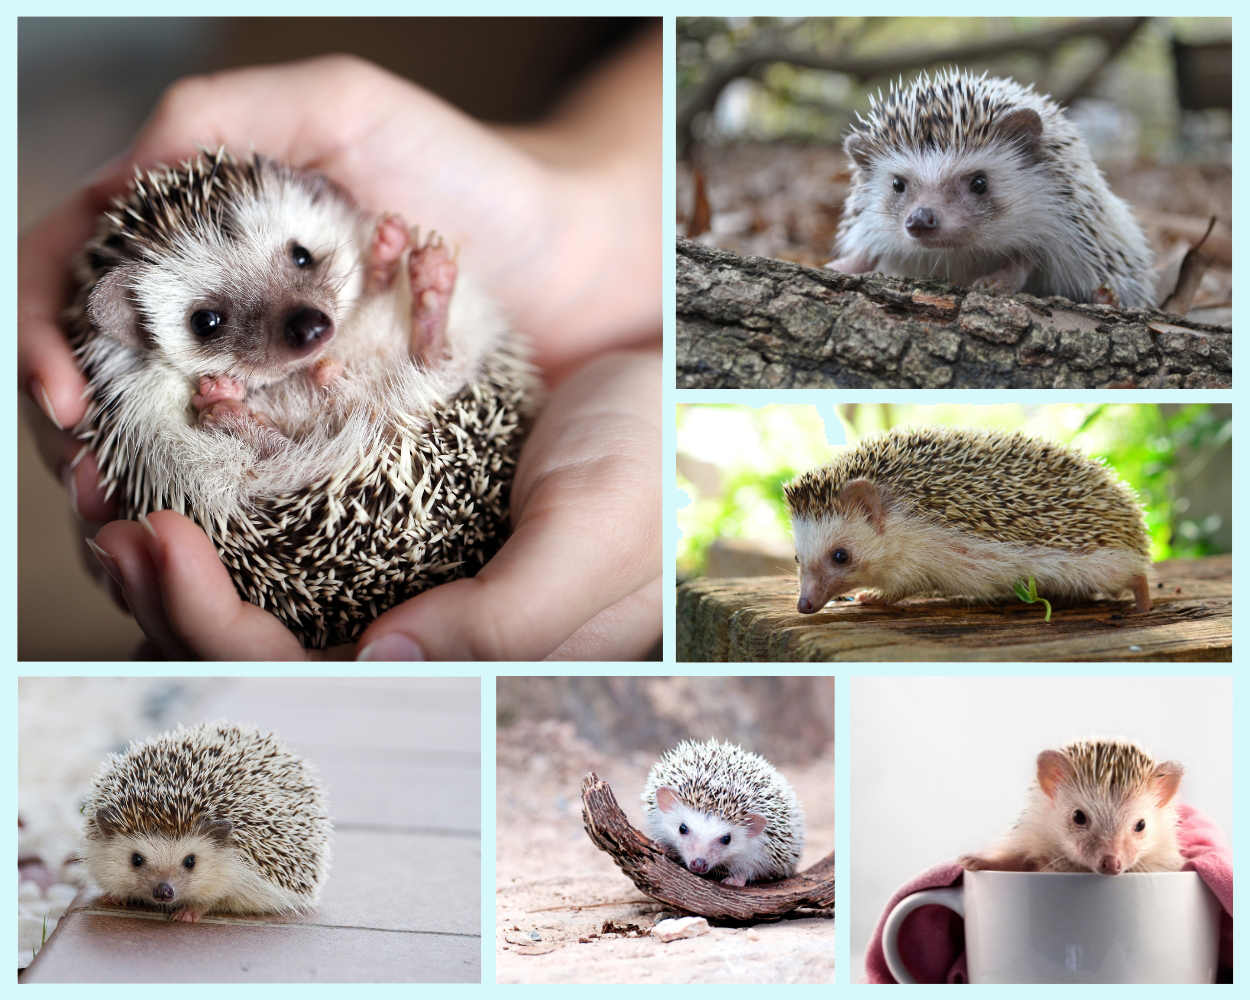
A hedgehog is a (super cute!) small mammal with a pointed face and a back covered in thousands of stiff spines. The spines help protect it from other animals. When a hedgehog feels frightened, it can curl into a tight ball so that its face, feet, and soft belly are safely tucked inside.
Hedgehogs are most active at night and use their strong sense of smell to search for insects, worms, and other food. They do not naturally live in the wild here in Arizona, so some of our younger artists may never have seen one before.
Before beginning the project, ask students what they notice about the hedgehog’s shape, face, and spines. This gives them a chance to learn about the animal before creating their own colorful, textured version.
Watch the Autumn Hedgehog Collage How To Video
Want to create along with me? In this Art Class with Miss Jenny video, I walk through the complete process of making a textured autumn hedgehog collage.
I show how to:
- Draw and trace the hedgehog template
- Safely cut the silhouette from cardboard
- Paint the body with yellow, orange, red, and brown
- Sort natural and craft materials by color and texture
- Arrange and glue the dimensional spines
- Add the face and final details
For my mixed-age class, I am cutting the cardboard silhouettes in advance so the students can focus on painting and collage. The video includes the cutting process so families, teachers, and older artists can make the entire project from the beginning.
Watch the full tutorial before starting, or pause after each step and create along with me.
What Kids Will Learn
During this project, students will:
- Recognize and work with a warm autumn color palette
- Explore the progression from yellow to orange, red, and brown
- Match natural and craft materials by color
- Combine painting and collage in one artwork
- Compare rough, smooth, soft, fuzzy, shiny, and bumpy textures
- Experiment with layering, repetition, pattern, and dimension
- Make individual creative choices while working from the same basic shape
Supplies and Materials
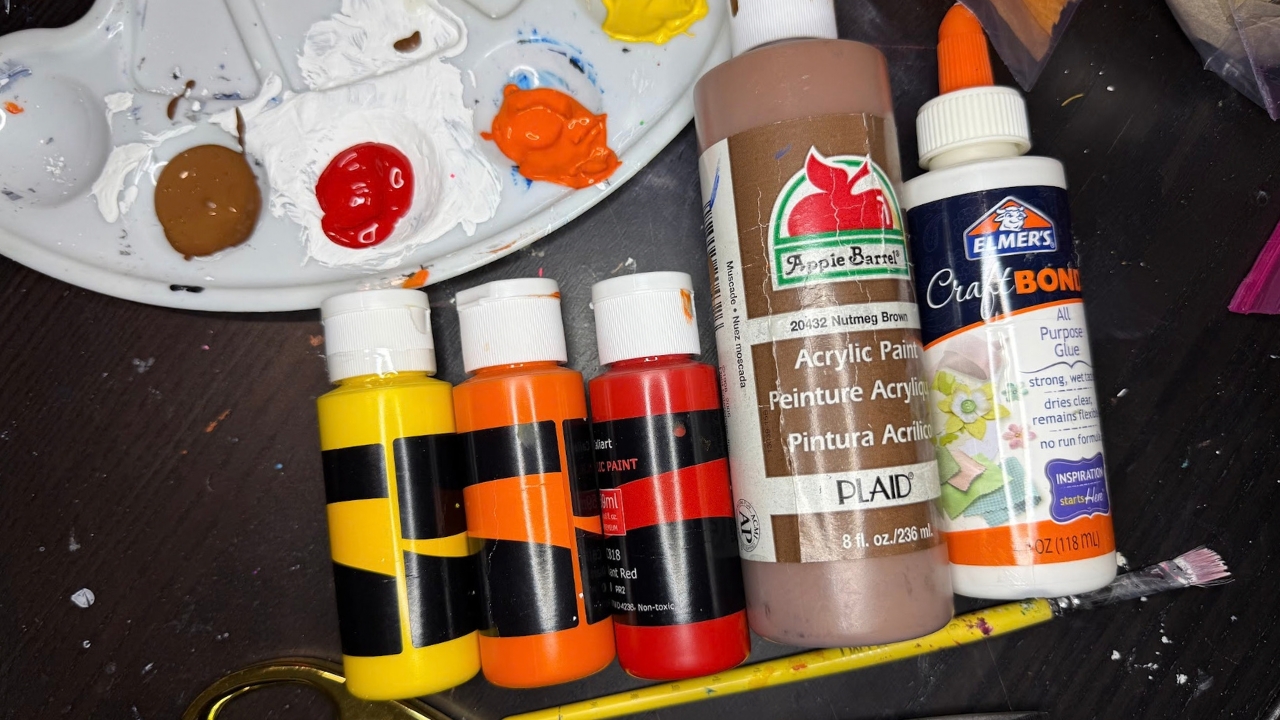
You will need:
- A sturdy cardboard box
- A hedgehog template or hand-drawn silhouette
- Pencil
- Scissors suitable for cutting cardboard
- Yellow, orange, red, and brown acrylic paint
- Medium-sized flat paintbrush
- Paint palette or paper plate
- Water cup
- Paper towels or a washable cloth
- White craft glue or tacky glue
- Black permanent marker
- Fabric scraps
- Yarn, wool, ribbon, and string
- Tissue paper and recycled paper
- Pom-poms, buttons, pipe cleaners, and cellophane
- Optional: Dried leaves, bark, small sticks, grasses, and acorns
- Table coverings or recycled packaging paper
You can also create an adult-managed hot-glue station for heavier materials that may not stay attached with regular craft glue. Children should not handle hot glue without close adult supervision.
For early finishers, have the free fall coloring pages available along with crayons, markers, colored pencils, or oil pastels.
Before You Begin: Prepare the Hedgehog Shape
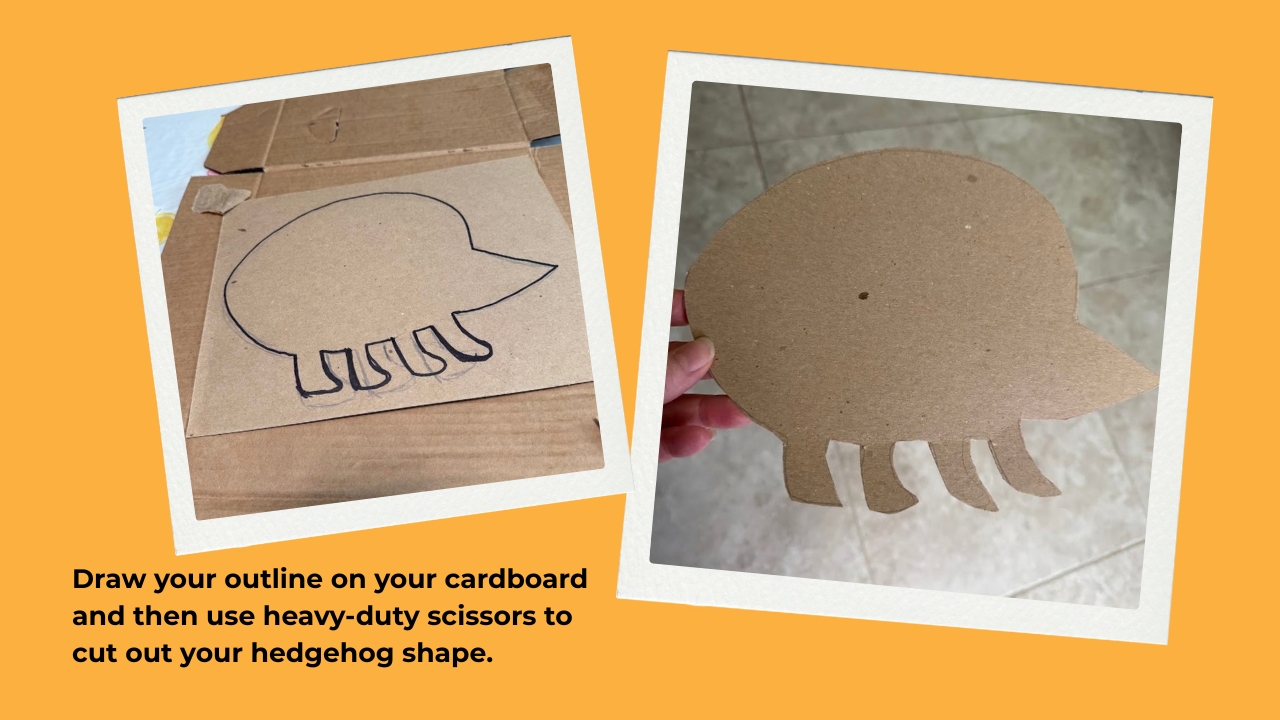
Start with one simple, side-facing hedgehog silhouette. Give it a large, rounded body so there is plenty of room for paint and collage materials. Add a pointed face and two small feet.
Download the Free Hedgehog Template
I created a free printable hedgehog template to make this project easier to prepare. Print it horizontally on standard 8.5-by-11-inch paper using the 100% or Actual Size setting.
Cut around the solid outside line, place the template on a flattened cardboard box, and trace the shape with a pencil. The dashed curved line separates the hedgehog’s face from the rounded body that will be painted and covered with collage materials.
If you are preparing several hedgehogs, transfer the printed shape onto a cereal box or thin chipboard to create a reusable stencil. You can also flip the stencil over to make some hedgehogs face the opposite direction.
Cut the traced silhouette from sturdy cardboard. An adult should handle this step, especially if heavy-duty scissors or a utility knife are required.
Write the artist’s name on the back before beginning. If you plan to hang the finished project, you can also punch a hole or attach a string loop before decorating it
Why I Am Pre-Cutting the Cardboard
In the video, I show how I trace and cut the hedgehog shape from cardboard. For my class, however, I am preparing all the silhouettes before the students arrive.
Our group includes very young children, and cutting thick cardboard requires stronger scissors and more adult assistance. It could also take up most of our available class time. By pre-cutting the hedgehogs, students can spend their time exploring color, texture, pattern, and collage.
For safety, an adult should cut heavy cardboard, particularly if a utility knife is required.
Step 1: Paint the Autumn Colors
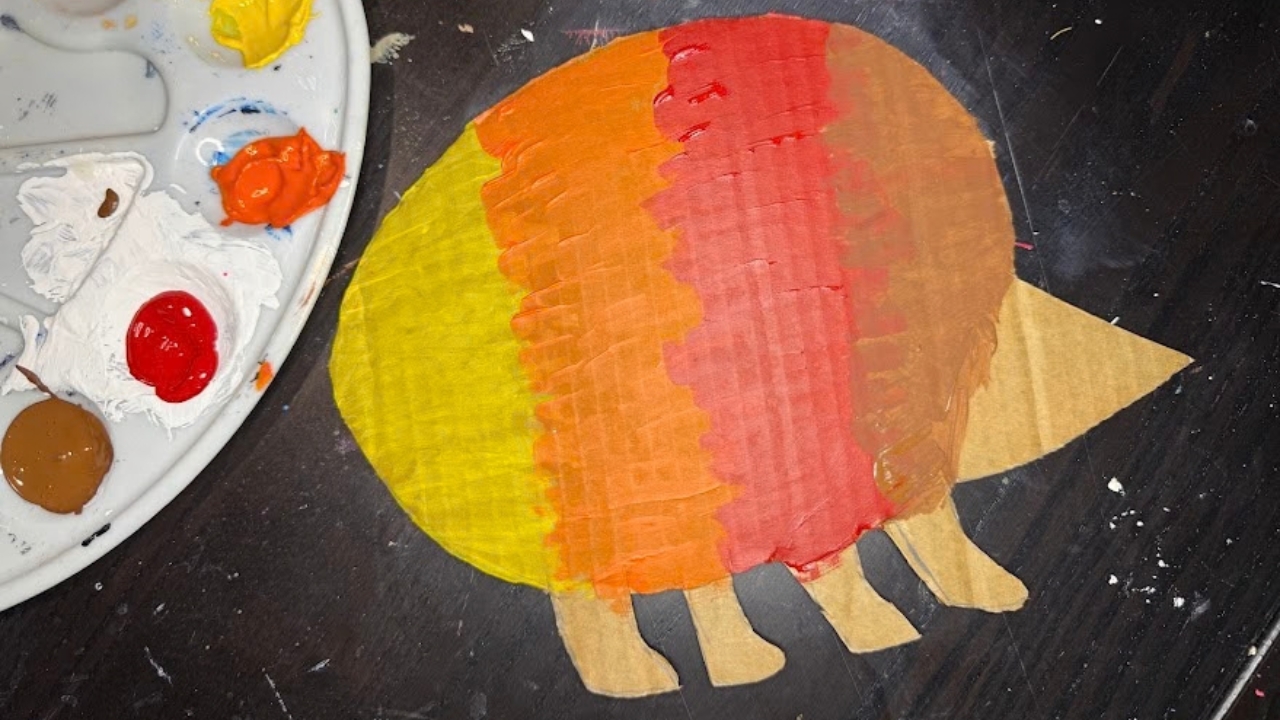
Begin painting the rounded portion of the hedgehog’s body with yellow, orange, red, and brown.
You can arrange the colors in order, beginning with yellow and gradually moving through orange and red to brown. You can also use the colors in stripes, patches, repeating patterns, or another arrangement.
Allow the colors to remain separate, or blend them slightly where they meet. As you paint, notice how these warm colors resemble the changing leaves we see during autumn.
Use a relatively light coat of paint so the cardboard dries quickly. Keep the face visible and avoid applying thick areas of paint that will take a long time to dry.
Allow the paint to dry completely before adding glue.
Step 2: Sort the Collage Materials
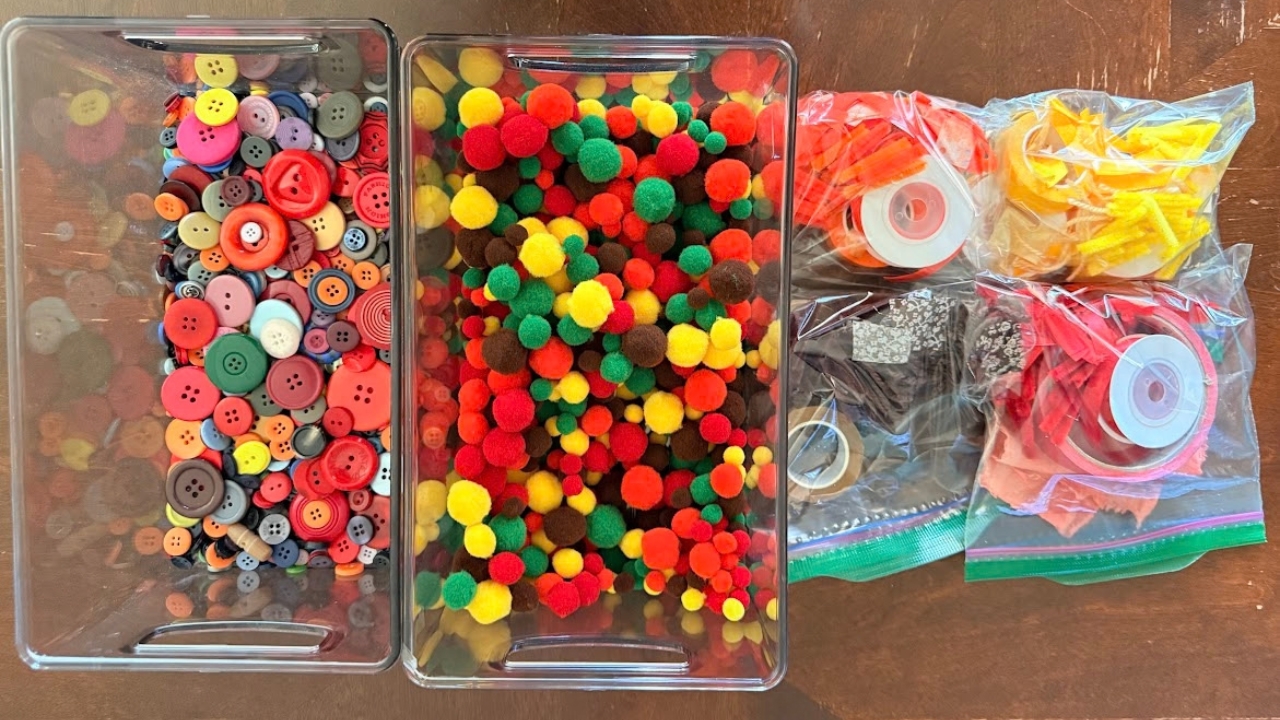
While the paint is drying, sort the collage materials into yellow, orange, red, and brown groups.
This is a great opportunity to talk about how one color can appear in many different shades. A golden-yellow leaf, pale-yellow piece of yarn, and bright-yellow pom-pom can all belong to the same color family.
Compare the different materials as you sort them. Which ones are rough, smooth, soft, fuzzy, shiny, hard, or bumpy? Which materials came from nature, and which ones were manufactured?
Students do not have to use every material. They can choose the colors and textures that interest them most.
Step 3: Arrange the Hedgehog’s Spines
Once the paint is dry, begin arranging materials on the rounded part of the hedgehog’s body.
Before gluing, experiment with different arrangements. Try:
- Rows of color
- Radiating lines
- Stripes
- Clusters
- Repeating patterns
- A gradual color transition
- A completely mixed and layered design
Place larger materials first, then use smaller pieces to fill the open spaces. Point sticks, leaves, yarn, and other narrow materials outward to create the appearance of hedgehog spines.
Allow some pieces to extend slightly beyond the cardboard edge. This will make the finished hedgehog feel more dimensional.
Step 4: Glue the Textured Materials
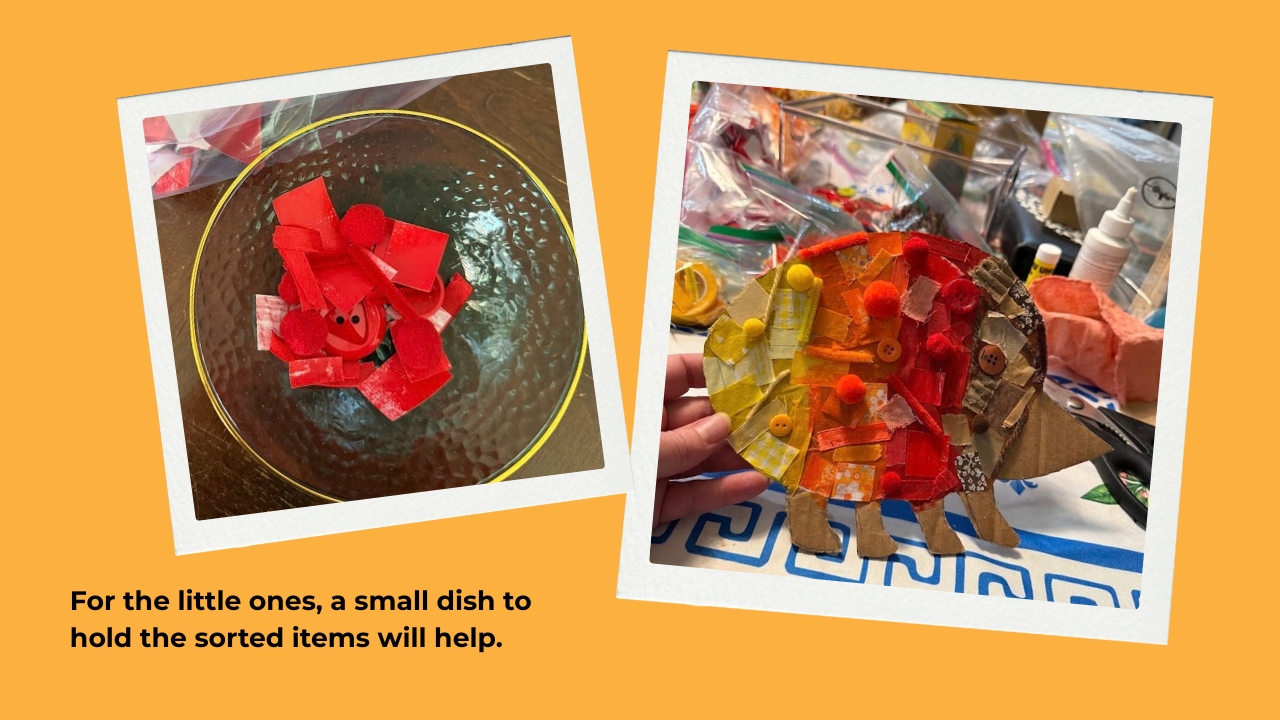
When you are happy with the arrangement, begin gluing the materials onto the painted cardboard.
White craft glue or tacky glue will work much better than a glue stick for this project. Apply enough glue to hold each piece securely, especially when attaching yarn, fabric, bark, sticks, buttons, or pom-poms.
Keep the collage materials on the rounded body and avoid covering the hedgehog’s face.
Ask an adult to help attach anything heavy, sharp, or difficult to secure. An adult can use hot glue for select pieces if necessary.
Step 5: Add the Face and Final Details
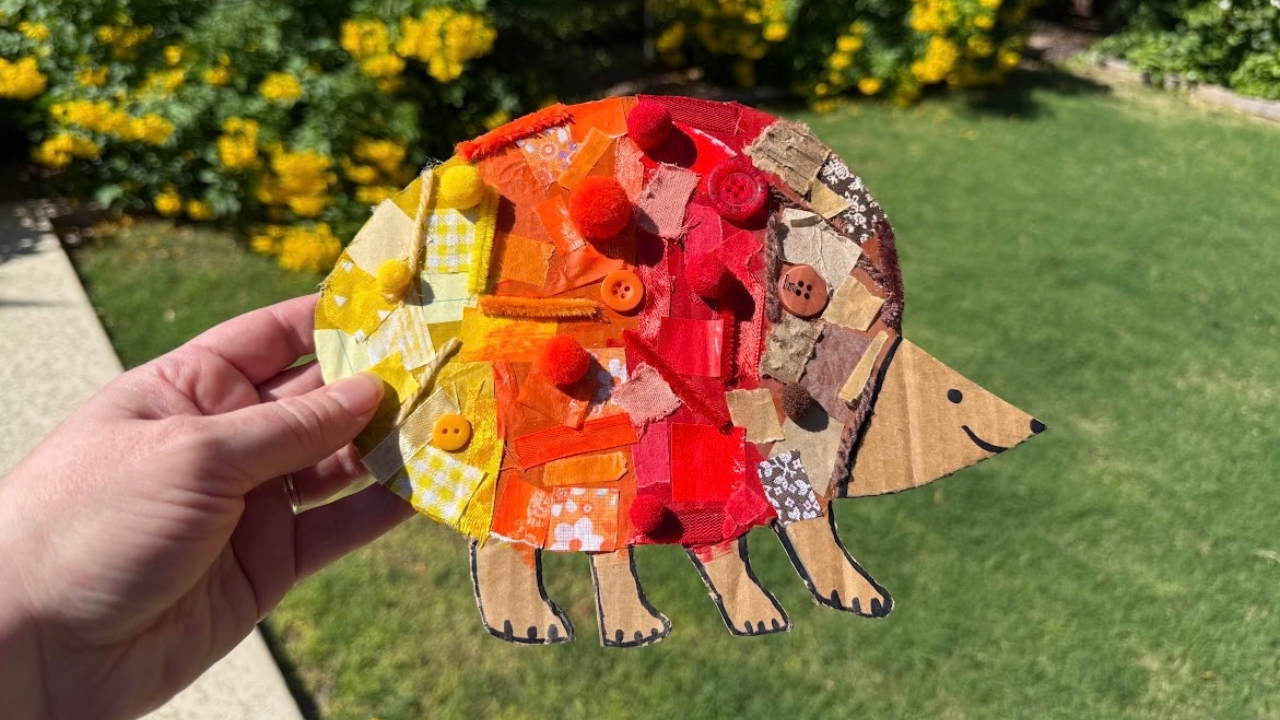
Once the painted face is dry, use a black permanent marker to add:
- An eye
- A nose
- A mouth
- Feet
- Eyelashes
- Cheeks
- Small patterns or other details
You can also add the artist’s name or give the hedgehog its own name.
Check the collage for loose materials and add more glue wherever needed. Let the finished hedgehog dry flat before moving, displaying, or hanging it.
One Project for Different Ages
I am using the same project with our entire mixed-age class rather than creating separate assignments.
Younger students can focus on painting, matching colors, exploring textures, and attaching larger materials. They may need help controlling the glue or securing small pieces.
Older students can create more deliberate color transitions, patterns, repetition, detailed texture, and balanced compositions. They can also spend more time planning where each material will go before gluing.
Because every student chooses their own materials and arrangement, the shared silhouette does not lead to identical artwork. Every hedgehog develops its own colors, textures, and personality.
Early Finisher Options
Students work at very different speeds, especially in a mixed-age class. I prepared two simple extension options so students who finish early can continue creating without beginning another wet painting project.
Free Fall Coloring Pages
Younger artists can choose from three free fall coloring pages:
- Hello Fall Hedgehog: A hedgehog beside a mushroom beneath a crescent moon and stars
- Autumn Time: Pumpkins, apples, leaves, flowers, clouds, and a friendly autumn moon
- Autumn Harvest: A fall truck, pumpkin wagon, leaves, acorns, pie, and a warm seasonal drink
Students can use the same yellow, orange, red, and brown palette from the hedgehog project, add patterns, or choose their own colors.
I recommend using crayons, markers, colored pencils, or oil pastels for this extension rather than beginning another wet painting activity while the rest of the class is finishing and cleanup is underway.
I would rename it slightly so it reflects what you actually created:
Autumn Color and Texture Collage Pages
Older students who want a more open-ended activity can create an autumn color and texture collage using a limited palette of yellow, orange, red, and brown.
For my examples, I used a mixture of torn, cut, handmade, painted, and upcycled papers. Some were created specifically for collage, while others came from tissue paper, gift wrap, packaging, napkins, painted scraps, and leftover materials from previous projects. Using papers from different sources creates more variation in color, pattern, transparency, and texture.
Students can experiment with several collage styles:
- A torn-paper collage with rough, overlapping edges
- A cut-paper collage using deliberate shapes and clean lines
- A paper mosaic made from many small pieces
- A layered collage combining transparent and opaque papers
- A repeating pattern organized by color, shape, or texture
- A gradual color transition moving from yellow to orange, red, and brown
- An autumn scene featuring leaves, trees, mushrooms, acorns, or a small hedgehog
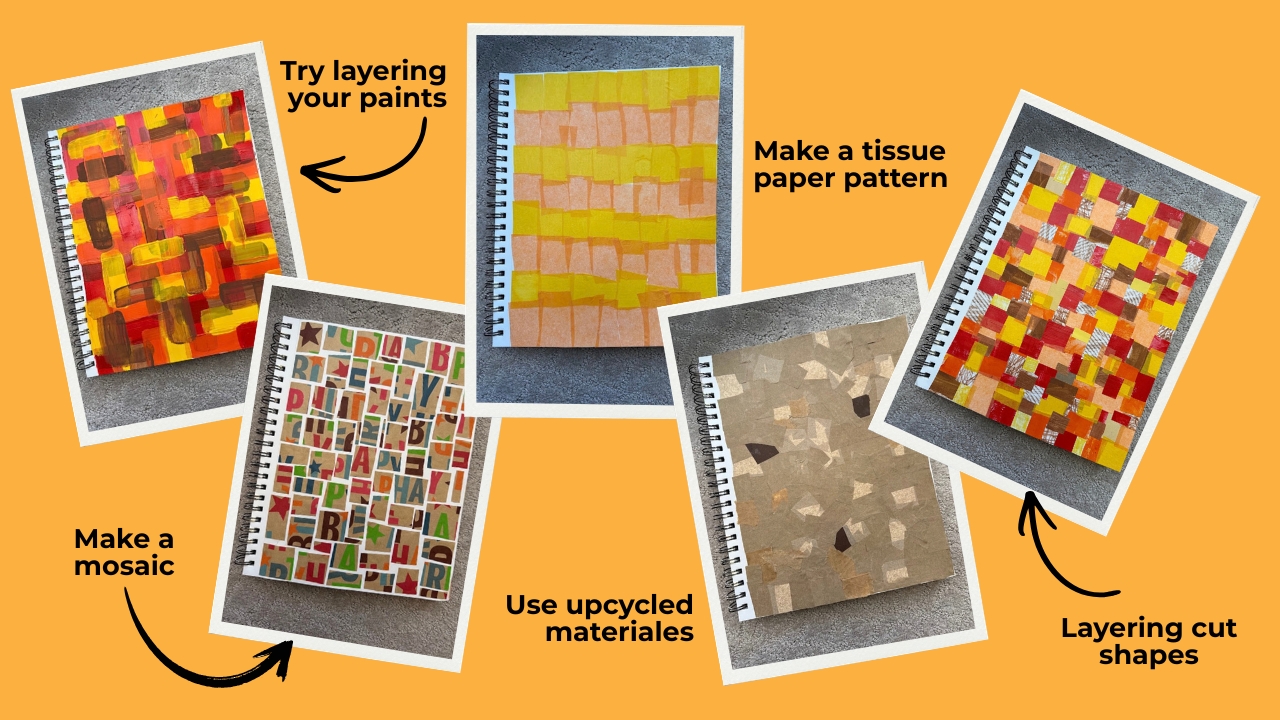
Markers, colored pencils, crayons, and oil pastels can also be used to add lines, dots, spirals, zigzags, mark-making, and other details over or around the collage.
I also created two additional video demonstrations: one showing how to make your own collage papers and another exploring different collage styles. Students can use these examples as a starting point while still making their pages completely their own.
Make Colorful Collage Papers Using Scrap
If the journals are not ready, the same activity can be completed on mixed-media paper, watercolor paper, or sturdy cardstock.
This extension continues our exploration of autumn colors, mixed media, texture, pattern, layering, composition, and upcycling. Because it primarily uses paper and other dry materials, students can continue creating without setting up another wet-paint station during cleanup.
Displaying the Finished Hedgehogs
Allow the projects to dry flat before moving them.
The hedgehogs can be displayed together to create a colorful autumn classroom wall. You can also hang them individually using a pre-punched hole or string loop.
If you are completing this as a group activity, photograph the entire collection before students take their hedgehogs home. Seeing all the different color arrangements and material choices together is part of the fun.
Every Hedgehog Is Different
This project begins with one simple cardboard shape, four autumn colors, and a shared collection of materials. From there, every child takes the project in a different direction.
Their choices of colors, textures, patterns, natural objects, and final details give each hedgehog its own personality. It is a fun reminder that students can begin with the same instructions and still create completely original artwork.

Jenny has a passion for learning and sharing what she learns. She has researched, written and published hundreds of articles on a wide variety of topics, including: SEO, art, design, marketing, ethics, business management, sustainability, inclusion, behavioral health, wellness and work-life balance.