
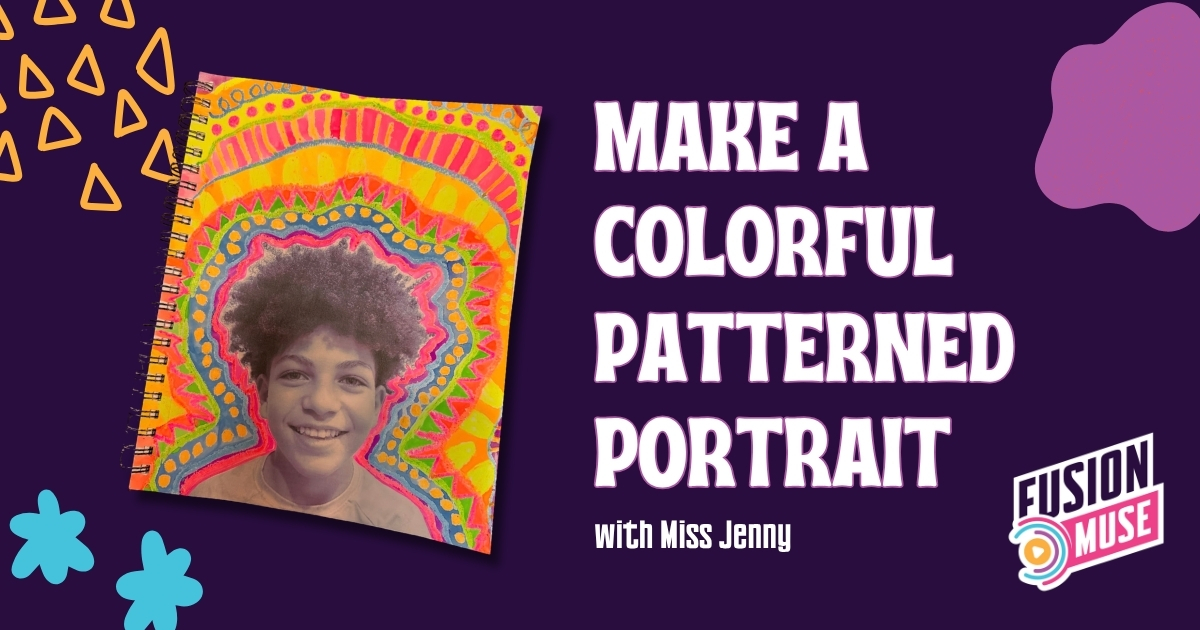
For our second art class, I wanted to do something with a self-portrait. But with a group that includes very young children, elementary-age kids, tweens, and teens, I did not want the entire lesson to depend on everyone being able to draw a realistic face.
Instead, I photographed each student and turned the pictures into black-and-white portraits. The photo gives every child a recognizable starting point, while the space around it becomes a place to experiment with lines, patterns, colors, and two different art mediums.
I used my son Camden as the example while I planned and tested the project. I started with a regular color photograph, edited it into a high-contrast black-and-white image, printed it, cut around him, and placed the portrait toward the bottom of the journal page. I will show both the original photo and the edited version so you can see how the image changed before it became part of the artwork.
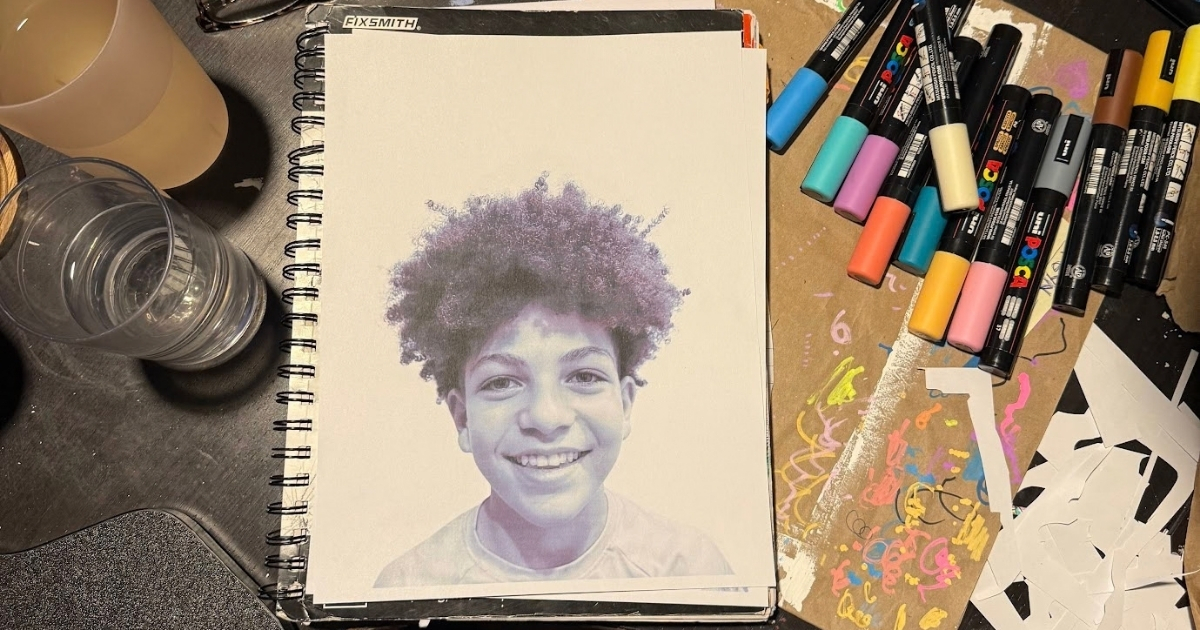
The goal is not to make a realistic portrait. It is to take an image of yourself and turn it into something expressive, energetic, and completely your own.
We are also continuing to work in the 9-by-12 mixed-media art journals we began during our first class. This project reviews some of the mark-making, lines, patterns, and repetition we discussed last week, then adds a new experiment with oil pastels and watercolor. If you want to make your own journal first, visit Make an Art Journal Cover with Miss Jenny. You can also complete this project on a separate sheet of heavy mixed-media or watercolor paper.
Watch the Colorful Patterned Portrait Video
What Kids Learn From This Project
This project introduces several art concepts without making the activity feel like a formal drawing lesson.
Students will:
- Learn what makes an artwork a self-portrait
- Explore line, shape, repetition, and pattern
- Combine photography, drawing, and painting in one mixed-media piece
- Discover how oil pastels and watercolor interact
- Experiment with color combinations
- Make individual creative choices instead of copying one finished example
Supplies and Materials
- Mixed-media art journal or heavy mixed-media paper (or watercolor)
- One black-and-white portrait printed on an 8×10 sheet of regular paper
- Optional backup portraits featuring funny, playful, or seasonal characters
- Scissors
- Glue stick
- Oil pastels in several bright colors
- Watercolor paint set
- Medium watercolor paintbrush
- Water cup
- Fine-mist spray bottle for activating the watercolor paints, optional
- Paper towels or a washable cloth
- Scrap paper for testing colors
- Black pen or marker for optional finishing details
Why We Are Using Oil Pastels and Watercolor
You could create a colorful portrait using markers, crayons, colored pencils, or many other supplies. For this lesson, however, the combination of oil pastels and watercolor is intentional.
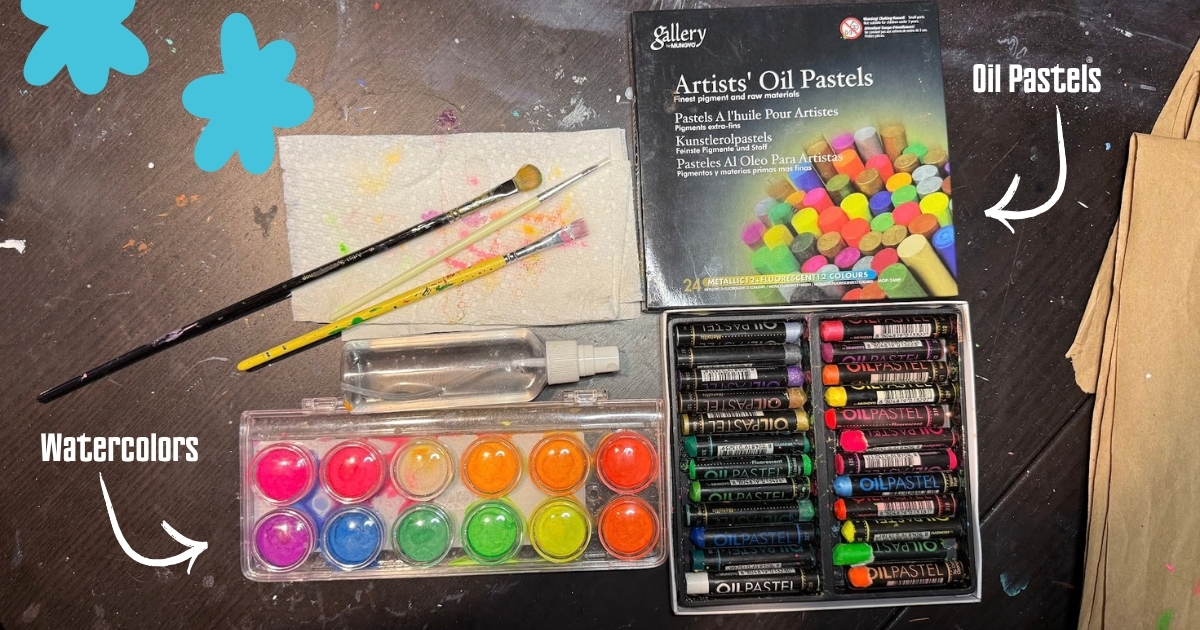
Oil and water do not mix. When watercolor is brushed over a strong oil-pastel mark, the watercolor moves away from the oily surface instead of covering it. This is called a watercolor-resist technique.
The oil-pastel lines remain bright and visible while the watercolor fills the exposed paper around them. Watching that effect appear is part of the lesson. If we replace the oil pastels or skip the watercolor, students will not have the same opportunity to see how these two mediums behave together.
Crayons can also create a resist, but oil pastels produce richer, softer marks and encourage students to experiment with a material they may not use as often.
Before Class: Prepare the Portraits
I photographed each student ahead of time so I could edit and print the portraits before class. A simple head-and-shoulders photo works well. I used my son Camden while testing the process, so the project photos show his original color photograph, the edited black-and-white version, and the finished artwork.
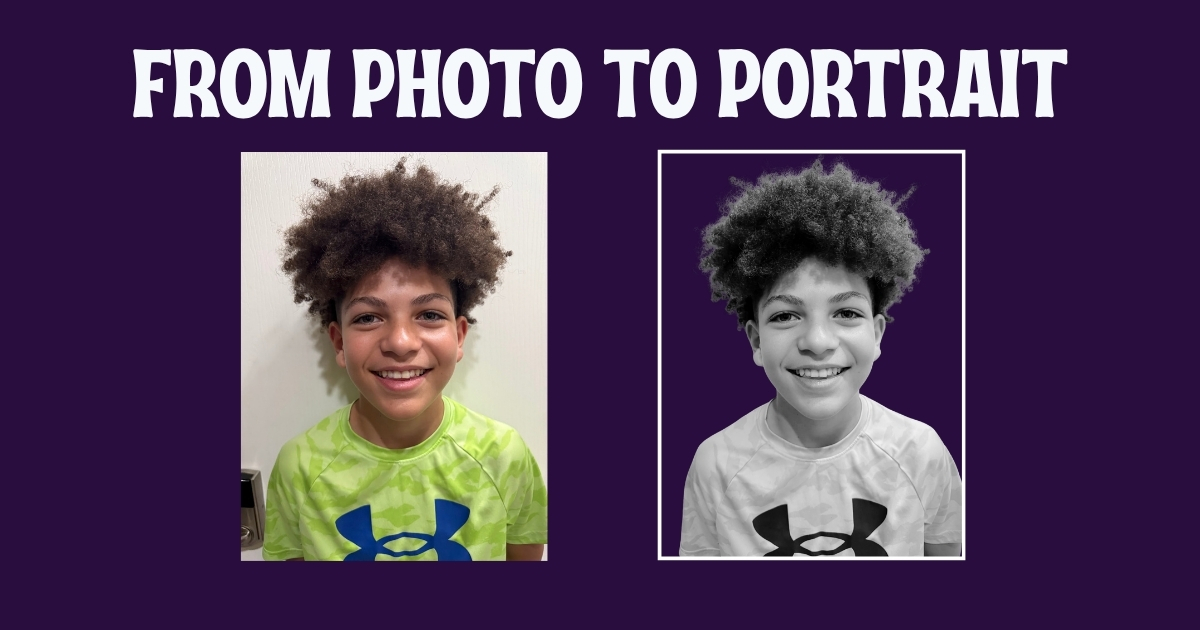
Convert the image to black and white and increase the contrast if needed. Because we are working in a 9×12 journal, I print each portrait on an 8×10 sheet of paper. However, the child should not fill the entire 8×10 page. Scale and position the portrait so that the child occupies roughly the lower half of the print, with plenty of blank paper above the head.
Once the portrait is cut all the way out and glued toward the bottom of the 9×12 journal page, at least half of the journal page should still be open above and around the head. That open area is important. It gives the artist enough room to create bold lines, patterns, and colorful designs that contrast with the black-and-white face.
A plain background makes the image much easier to cut out. When editing, pay attention to the outline around the hair, head, and shoulders so the shape remains recognizable after the background is removed.
For younger children, I recommend cutting the portraits out in advance. Older students can cut their own, but make sure they have scissors that cut cleanly. Dull scissors make this step unnecessarily frustrating and can tear the printed photo.
You can also glue the portraits into the journals ahead of time for the youngest students. That allows them to begin with the patterns and colors, which are the main focus of the lesson.
No Photo Yet? Choose a Backup Portrait
In a real class, not every child will necessarily be present when photographs are taken. Some may leave early, join the group later, or miss the class entirely. I may not have every student’s portrait prepared before we begin, so I am also creating a selection of backup portraits.
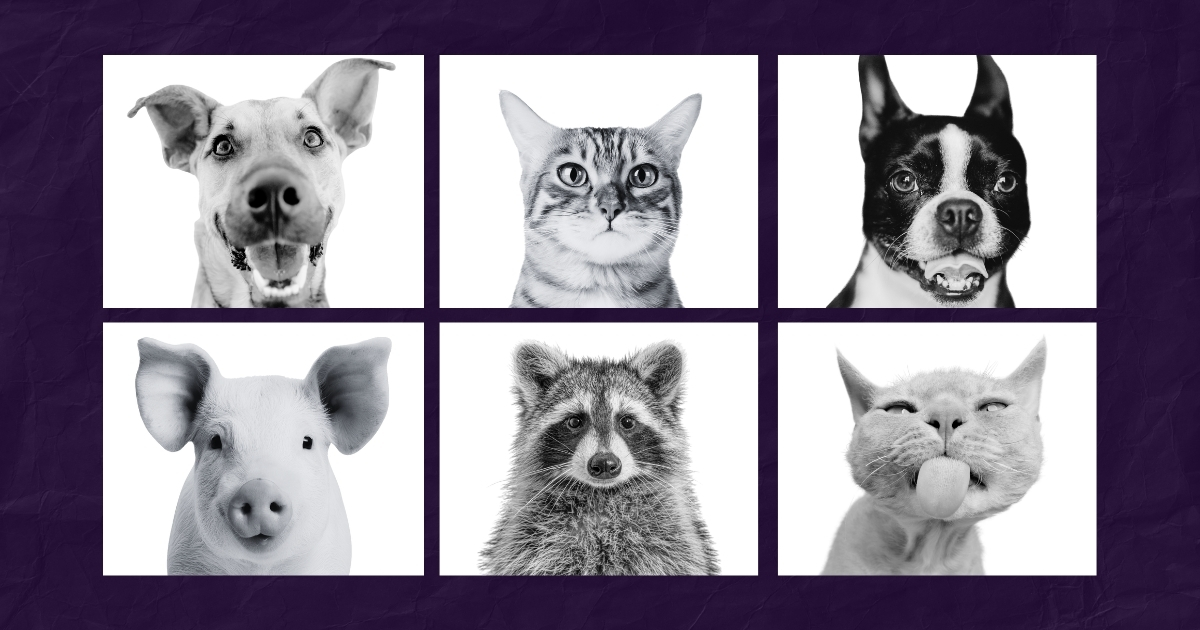
These can be funny faces, animals, monsters, robots, playful characters, or seasonal images. Students can choose one and complete the same oil-pastel and watercolor-resist activity on a separate sheet of heavy watercolor or mixed-media paper.
The backup version still gives them a chance to review mark-making and lines from our previous class, experiment with oil pastels and watercolor, and explore the contrast between a black-and-white image and a colorful patterned background. When their real photograph is available, they can create a true self-portrait in the journal later.
Need a portrait for this project?
Download our free printable animal faces and choose one to use in place of a personal photograph.
Step 1: Fussy Cut and Glue the Portrait
Fussy cutting means carefully cutting around the outside edge of an image instead of leaving it inside a square or rectangle. This can be challenging for younger students, especially around textured or curly hair.
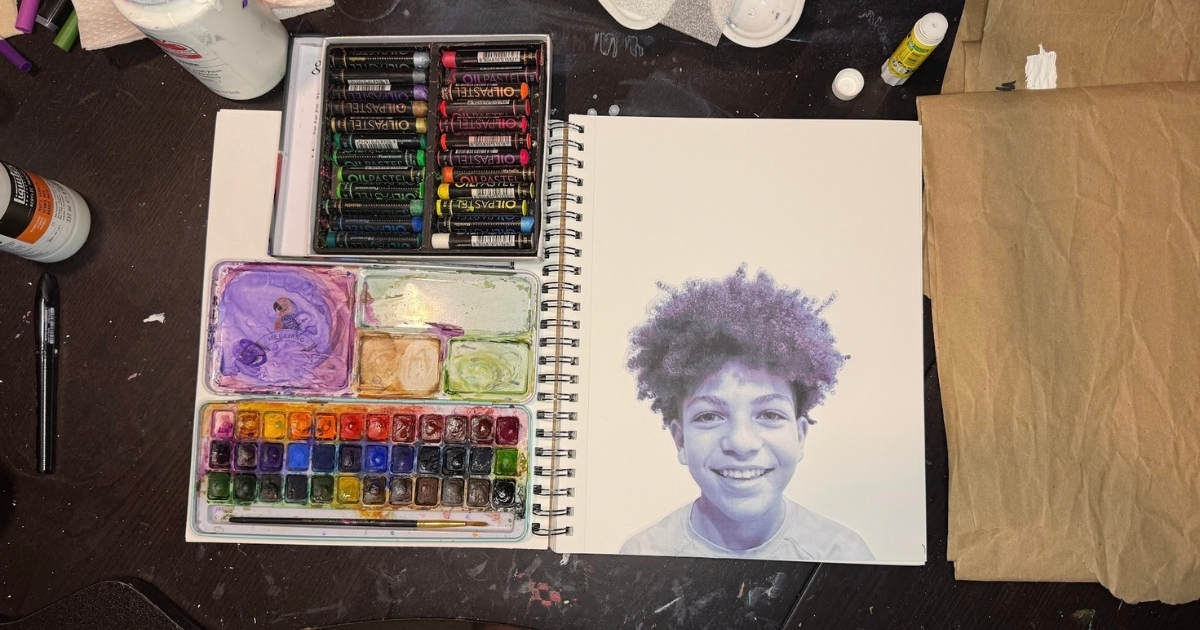
For class, I will prepare two versions. Younger students will receive a portrait that has already been cut out, and I may also glue it into the journal ahead of time if the books are ready. Older students who want to practice fussy cutting can receive an uncut version and cut around their own portrait.
The placement is already part of the way I cropped and edited the photographs. The portrait belongs along the bottom edge of the 9×12 journal page, not floating somewhere in the center. Include the head and a small amount of the shoulders, then place the bottom of the cutout flush with the bottom of the page. This allows the shoulders to continue off the page instead of ending in visible cut lines along the sides.
The portrait should occupy approximately the lower half of the page, leaving the upper half white and open. That is where students will create their oil-pastel lines, patterns, and watercolor background. The small amount of shoulder keeps the portrait from looking like a floating head, while the open space above creates the room needed for the actual art lesson.
Ideally, students will complete this project directly in their mixed-media journals. If the journals are not available yet, glue the portrait along the bottom of a 9×12 sheet of heavy watercolor paper instead. The finished page can be kept as a separate artwork or added to the journal later.
Once the portrait is ready, cover the entire back of the cutout with a good extra-strength glue stick. Pay special attention to the hair, shoulders, and every small outer edge.
Press the portrait down firmly and smooth it from the center outward. Check every edge before moving on. If anything lifts, add more glue underneath and press it down again. This needs to be glued very well because the page will be handled, drawn on, and painted. Any loose edge will be much harder to repair once the watercolor is added.
Step 2: Add Oil-Pastel Lines and Patterns
Begin at the cut edge of the portrait and use an oil pastel to draw a line that follows the shape of the hair, head, and shoulders. Continue building lines outward across the open background.
The lines can echo the outline of the portrait, curve across the page, form bands, or divide the background into smaller sections. Keep the oil pastel in the background rather than drawing across the face.
The sections do not need to be equal, symmetrical, or perfectly straight. Try curved lines, zigzags, loops, rays, scallops, or wavy shapes. Use one color for all the dividing lines, or change colors as you move around the page.
Next, fill the sections with different lines, shapes, and repeating patterns. Try:
- Dots and circles
- Stripes
- Zigzags
- Spirals
- Checkerboards
- Scallops
- Stars
- Hearts
- Leaves or flowers
- Repeating geometric shapes
- Symbols that represent something you enjoy
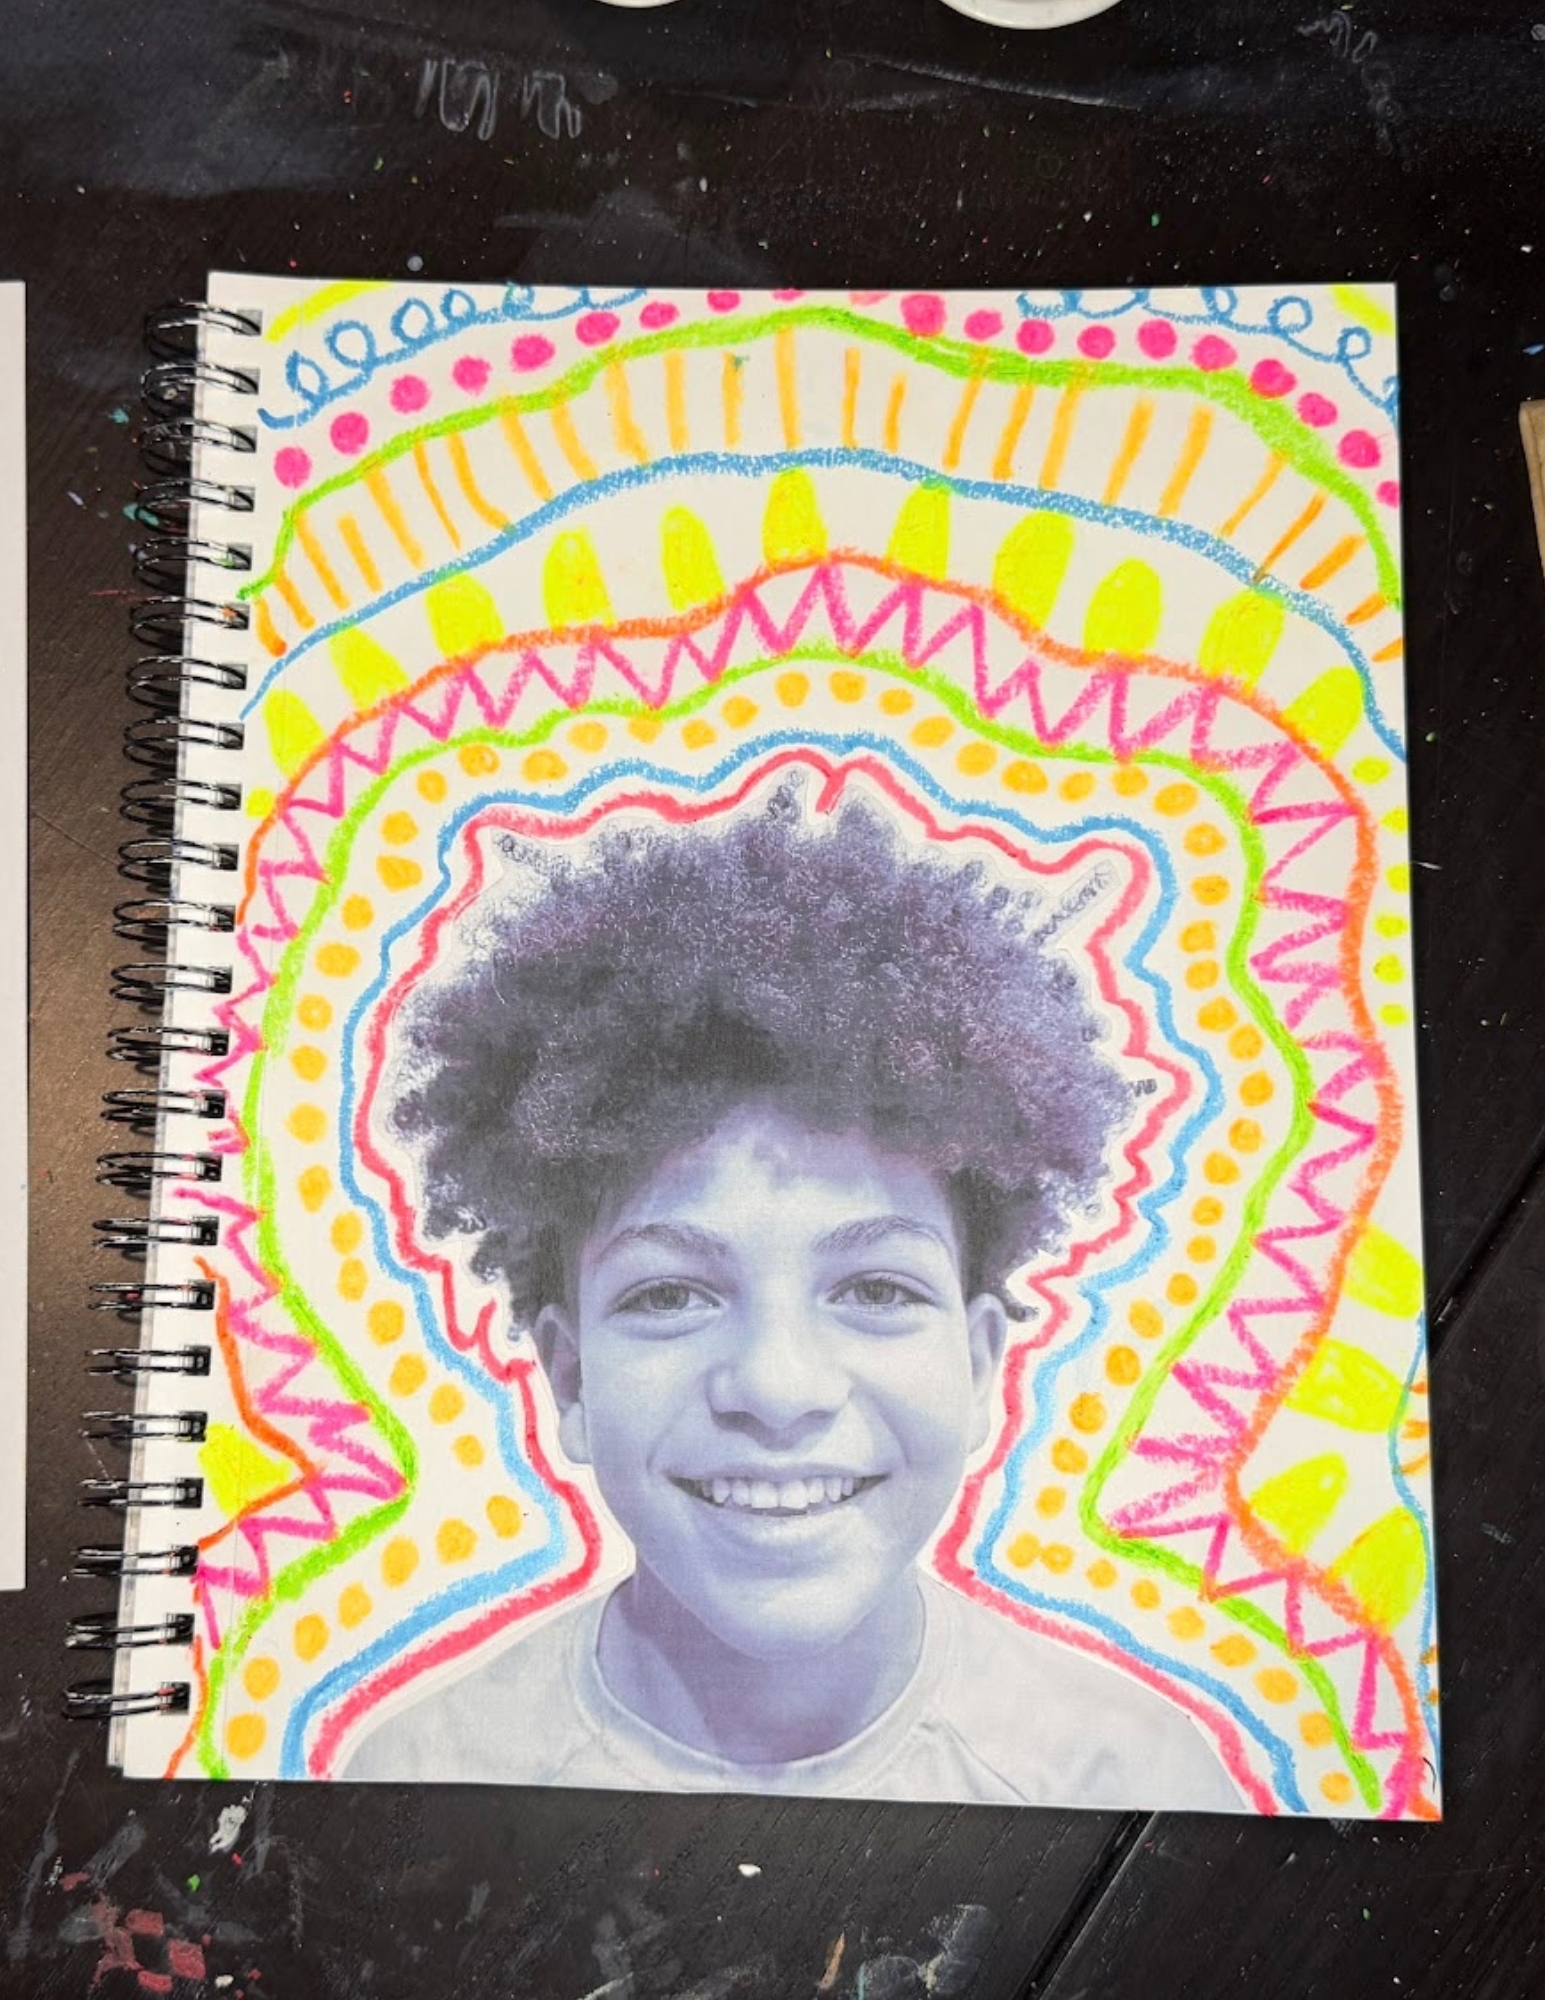
Press firmly enough to leave a thick, visible layer of oil pastel. Light, scratchy marks may not resist the watercolor as clearly. Leave some of the white paper showing between the marks because the exposed paper is where the watercolor will settle during the next step.
You can repeat a few favorite patterns or make every section different. Younger students may want to work with larger shapes and three or four simple patterns. Older students can create smaller sections, more detailed designs, repeated motifs, or a limited color palette.
Step 3: Paint Over the Patterns With Watercolor
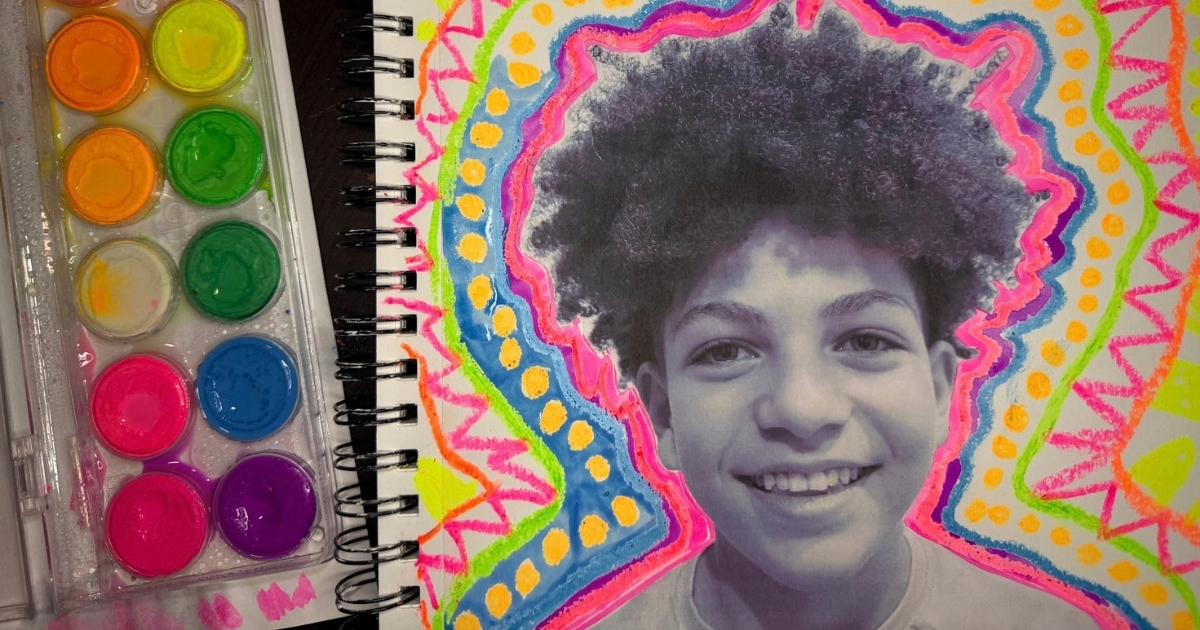
Before painting the portrait page, make a few oil-pastel marks on scrap paper and brush watercolor across them. The watercolor should settle into the exposed paper while the pastel remains bright and visible. This quick test lets students see the resist effect before they begin painting their artwork.
If the watercolor pans are dry, lightly mist them with water and let them sit for a moment. This activates the paint and produces stronger color without requiring students to scrub the brush into the palette.
Brush watercolor over the oil-pastel lines and into the open white spaces. Use one color in each section, blend colors together, or let the watercolor move across several areas. Paint right up to the cut edge of the portrait, but avoid flooding the printed photograph with water.
Try not to use so much water that it pools heavily on the page. Mixed-media paper can handle watercolor, but a lighter application will dry faster and reduce buckling.
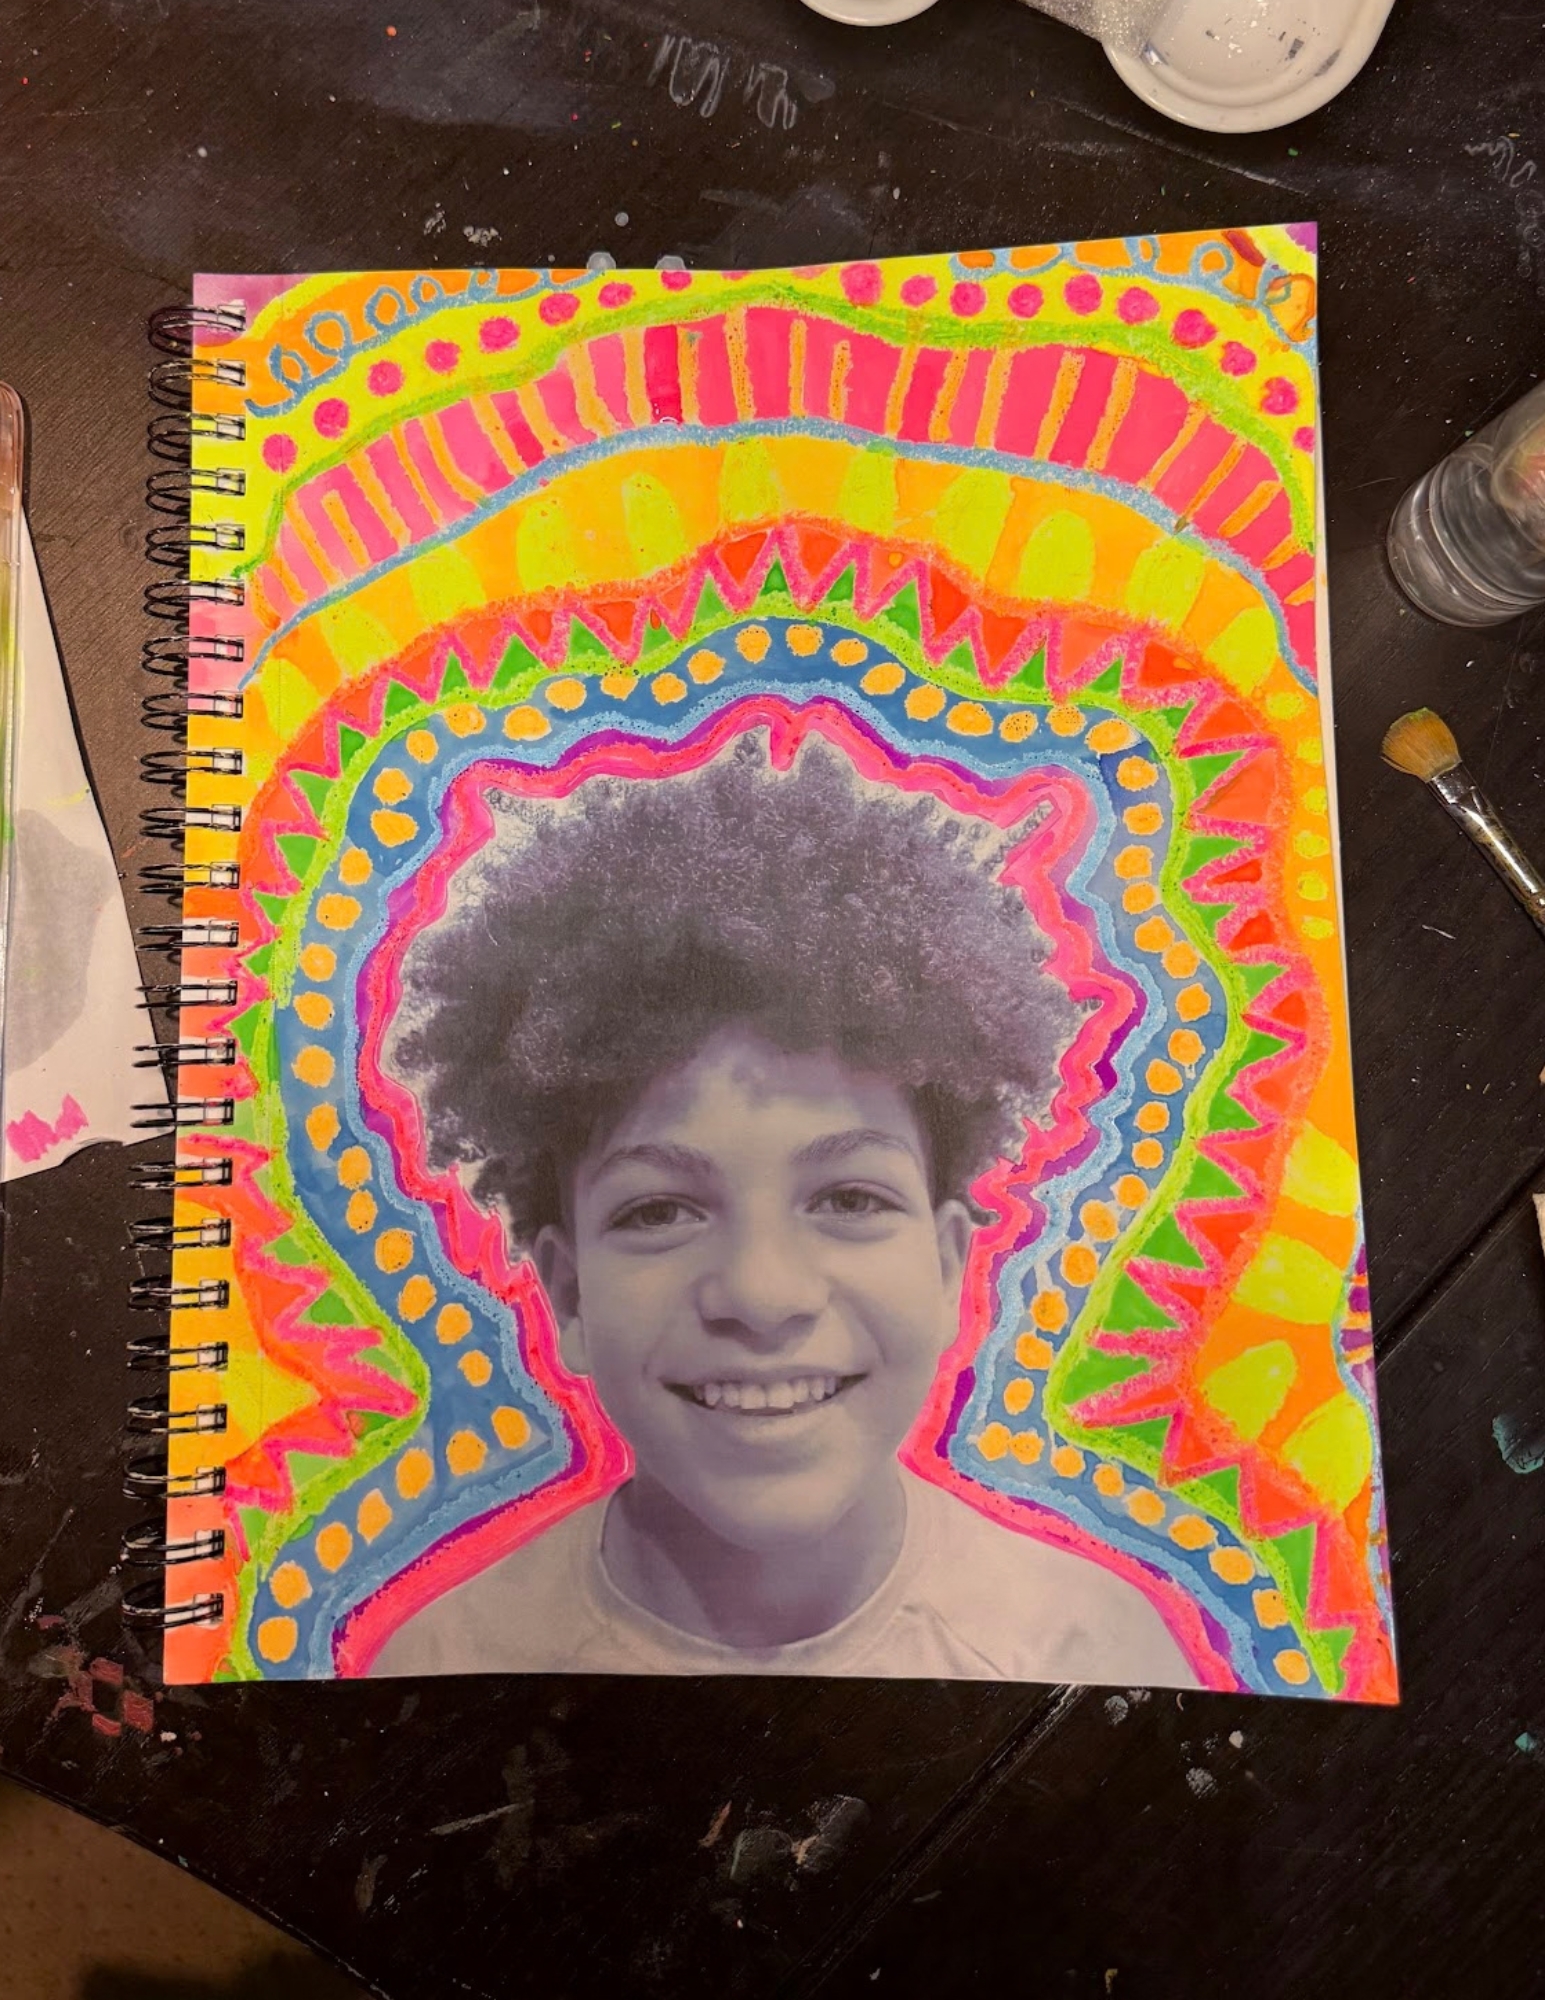
Keeping the photograph black and white creates a strong contrast against the colorful background.
As the watercolor crosses the pastel lines, notice which marks resist the paint most clearly. This is the moment when the two mediums begin working together and the patterns really come alive.
Step 4: Let the Page Dry
Set the journal open and allow the page to dry completely. Place a paper towel or piece of scrap paper behind the wet page so moisture does not transfer to the next sheet.
Once the watercolor is dry, students can decide whether the portrait needs anything else. Add a few black outlines, repeat a pattern, write the date and project name, or leave it exactly as it is.
Make the Project Work for Different Ages
Younger Artists
- Prepare and glue the portrait in advance
- Create fewer, larger background sections
- Offer a smaller selection of oil-pastel and watercolor colors
- Demonstrate a few easy patterns before they begin
- Have an adult help manage water and brushes
Older Artists
- Let students cut their own portraits before gluing them along the bottom edge
- Challenge them to create a more complex pattern system
- Ask them to select a limited or intentional color palette
- Incorporate symbols, words, or motifs that represent their personalities
- Explore warm and cool colors or complementary color combinations
Ideas for Early Finishers
Students who finish early can:
- Add a patterned border around the page
- Create a color-and-pattern key on the facing page
- Make a small second portrait using a different color palette
- Write a few sentences about the patterns or colors they chose
- Test more oil-pastel and watercolor combinations on a separate journal page
Questions to Ask After the Project
- What happened when the watercolor touched the oil pastel?
- Which pattern was your favorite to make?
- Which colors worked well together?
- How does the black-and-white photograph change the way the bright background looks?
- What would you change or try differently next time?
Make Your Portrait Your Own
Every finished portrait should look different. The photograph provides the starting point, but the colors, lines, patterns, placement, and small details belong to the artist.
That is one reason I love this project for a mixed-age group. Younger artists can enjoy the immediate magic of watercolor resist, while older students can make thoughtful choices about composition, symbolism, repetition, and color.
Most importantly, the project gives every student a chance to see themselves inside their art journal.
It becomes a colorful record of who they were, what they chose, and how they experimented on that particular day.
If you try this project at home, in a homeschool group, or in your own classroom, remember that the goal is not to make every portrait look the same.
Give each artist a photograph, introduce the technique, and then let their patterns tell the rest of the story.

Jenny has a passion for learning and sharing what she learns. She has researched, written and published hundreds of articles on a wide variety of topics, including: SEO, art, design, marketing, ethics, business management, sustainability, inclusion, behavioral health, wellness and work-life balance.