
Hi, it’s Miss Jenny!
I’m getting ready to start teaching a weekly art class for a local homeschool group, with around 20–25 kids of different ages, so I’ve been spending a lot of time planning, testing projects, and figuring out what will actually work well in a group setting.
And yes, that means I get to make all of the projects first. 🙂
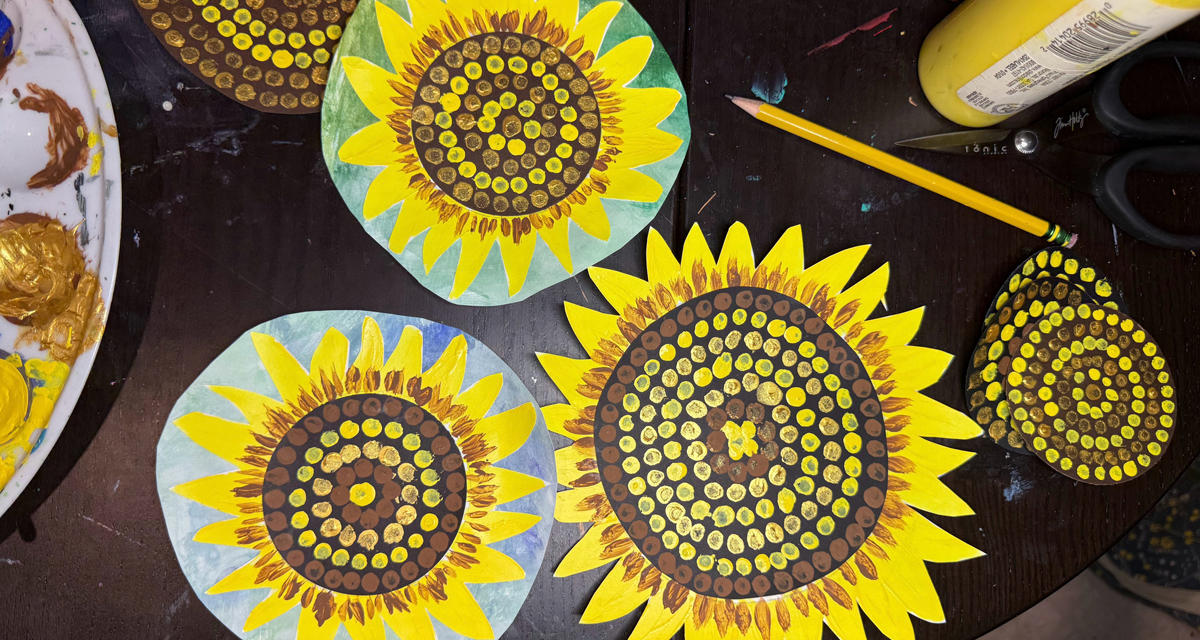
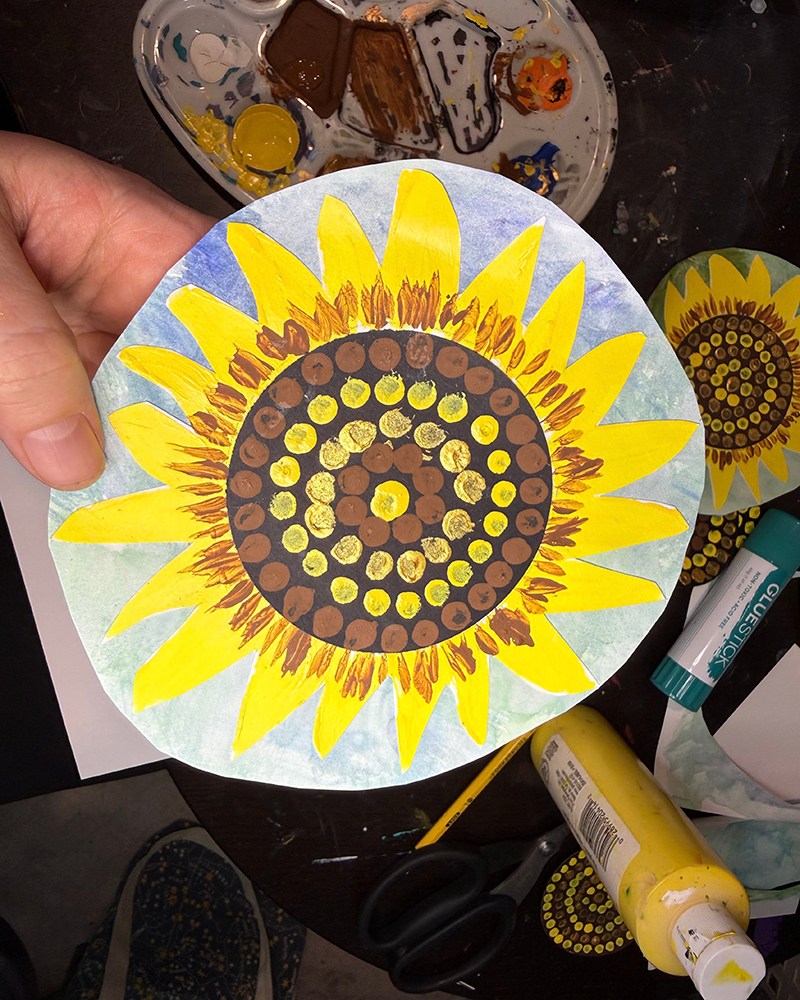
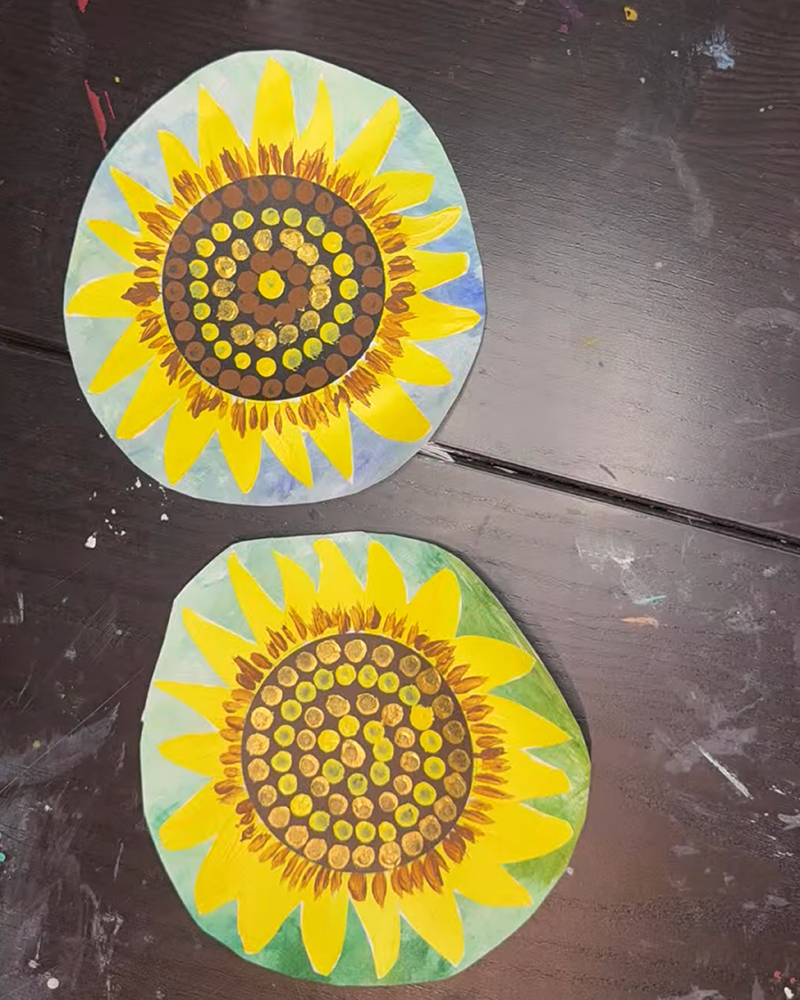
This painted sunflower is one of the projects I wanted to test because it combines so many different art techniques without being overly complicated. We’re painting, stamping, using watercolor, cutting, layering, and putting everything together into one bright mixed-media piece.
It also leaves plenty of room for kids to make it their own, which is always one of my favorite parts.
What We’re Making
For this project, we’re creating a layered sunflower with painted petals, a textured center, and a loose watercolor background.
The center of the flower is especially fun because we use cotton swabs dipped in different shades of paint to create all of those little dots and patterns you see inside a sunflower.
The finished piece feels colorful and dimensional without requiring any complicated art skills.
Supplies You’ll Need
- White cardstock
- Black or brown cardstock
- Pencil
- Scissors
- Glue
- Cotton swabs
- Acrylic paint in white, yellow, brown, black and gold
- Green watercolor paint
- Thick and thin paintbrushes
- Water cup
- Paint palette or paper plate
- Paper towels or a cloth for cleanup
Here’s what I used for my sunflower:
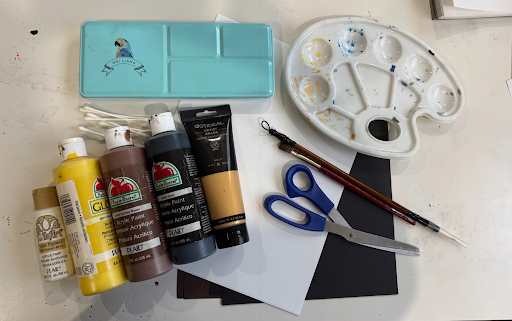
You can absolutely improvise with what you already have. Art does not have to require a giant shopping list.
If you don’t have every exact paint color, mix your own. If you don’t have cardstock, use the heaviest paper you have available.
How to Make Your Painted Sunflower
Step 1: Cut Out the Flower Center
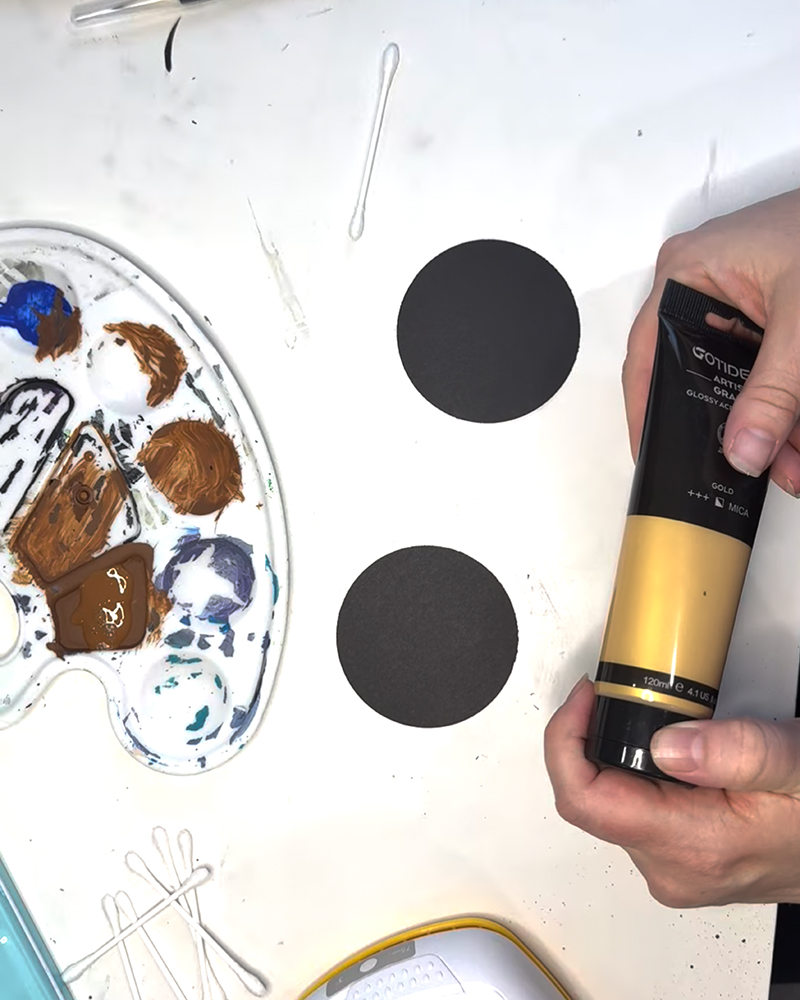
Start by cutting a circle from black or brown cardstock.
I experimented with a few different sizes, and I personally liked the larger circles best. That said, I also have a three-inch circle punch, which worked really well for some of the smaller versions.
If you’re doing this with younger kids or just want to save time, a circle punch is an easy shortcut.
You can also trace something round, or just eyeball it.
I actually like the slightly imperfect circles because they make each flower feel a little more organic.
Step 2: Create Your Painted Pattern
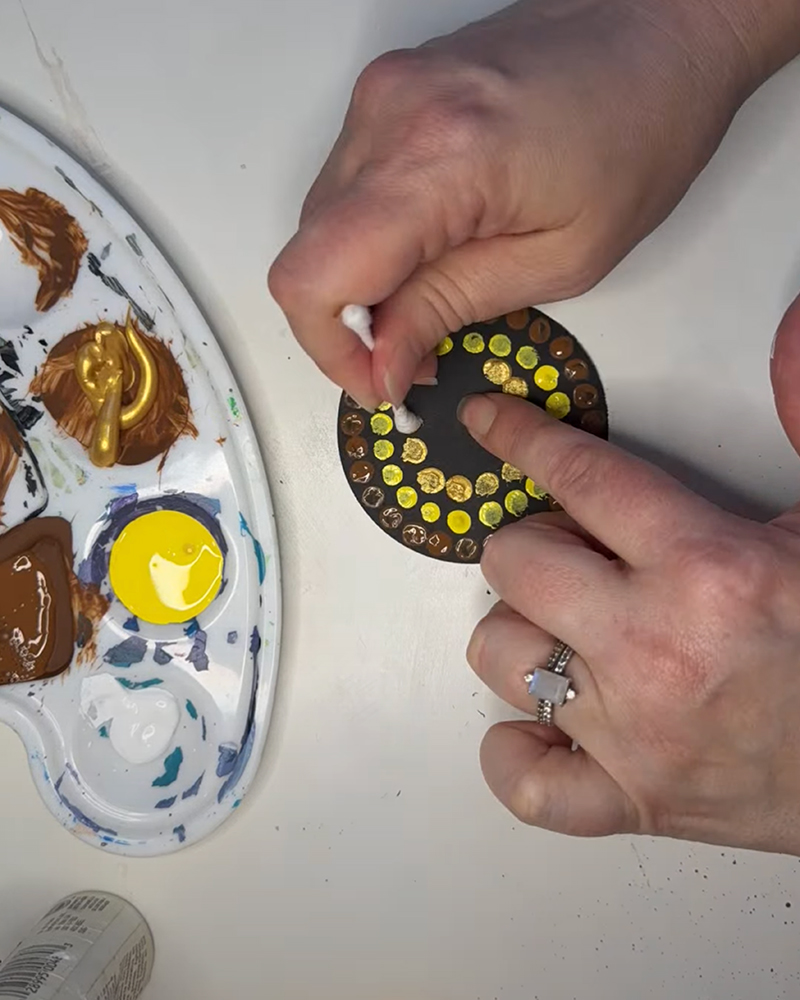
Next, lay out your acrylic paints and decide what kind of pattern you want to create.
This is where the project gets really fun because there really are no rules. You can use white, yellow, gold, brown, black, or any combination you like.
Using a cotton swab, begin adding painted dots around the circle. I recommend starting around the outside edge and working your way toward the center rather than beginning in the middle.
For little hands, you may need to help hold the cardstock in place while they work.
You can also use the end of a paintbrush instead of a cotton swab if that feels easier.
Once the circle is filled with your pattern, set it aside and let it dry completely.
Step 3: Paint the Sunflower Petals
Once the painted center is dry, place it on a piece of white cardstock and lightly trace around it with a pencil.
That circle gives you a guide for where the sunflower center will eventually sit.
From there, paint your sunflower petals around the outside of the traced circle.
I free-handed mine because I like the slightly uneven, organic look. For younger kids, you could have them sketch their petals in pencil first and then paint over them.
Again, they do not need to be perfect.
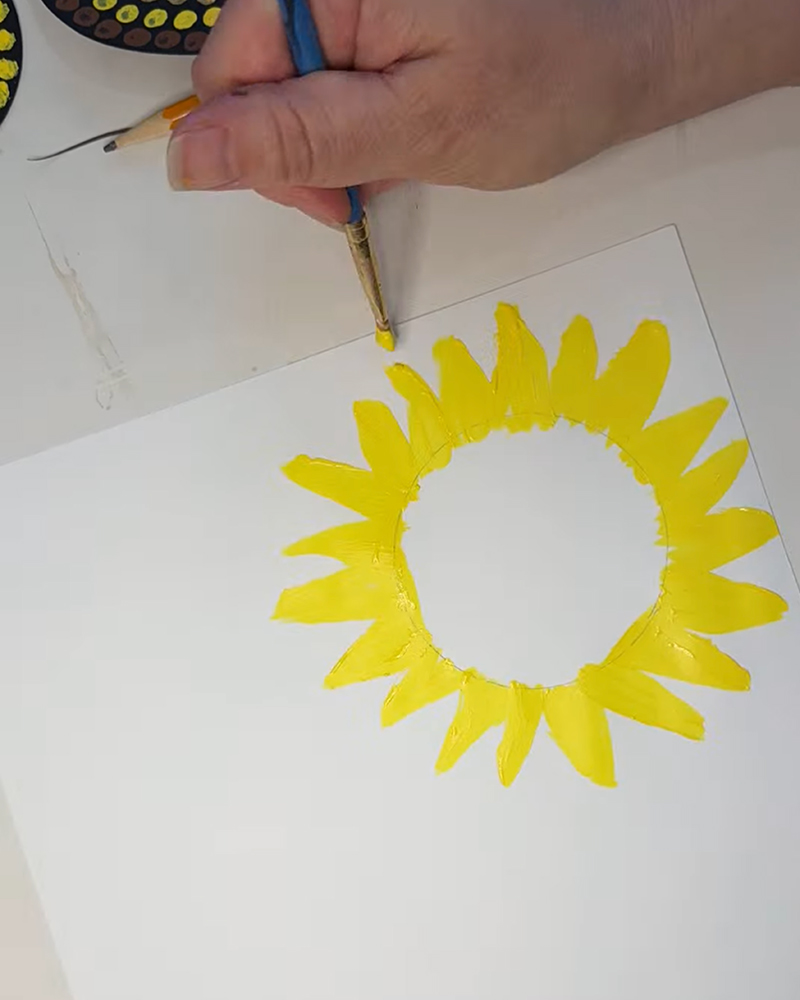
Step 4: Add the Brown Center Detail
Let the yellow petals dry.
Once they’re dry, use brown acrylic paint around the inside edge where the petals meet the traced circle.
This helps cover any pencil marks and creates a little more depth around the center of the flower.
Let everything dry again before moving on.
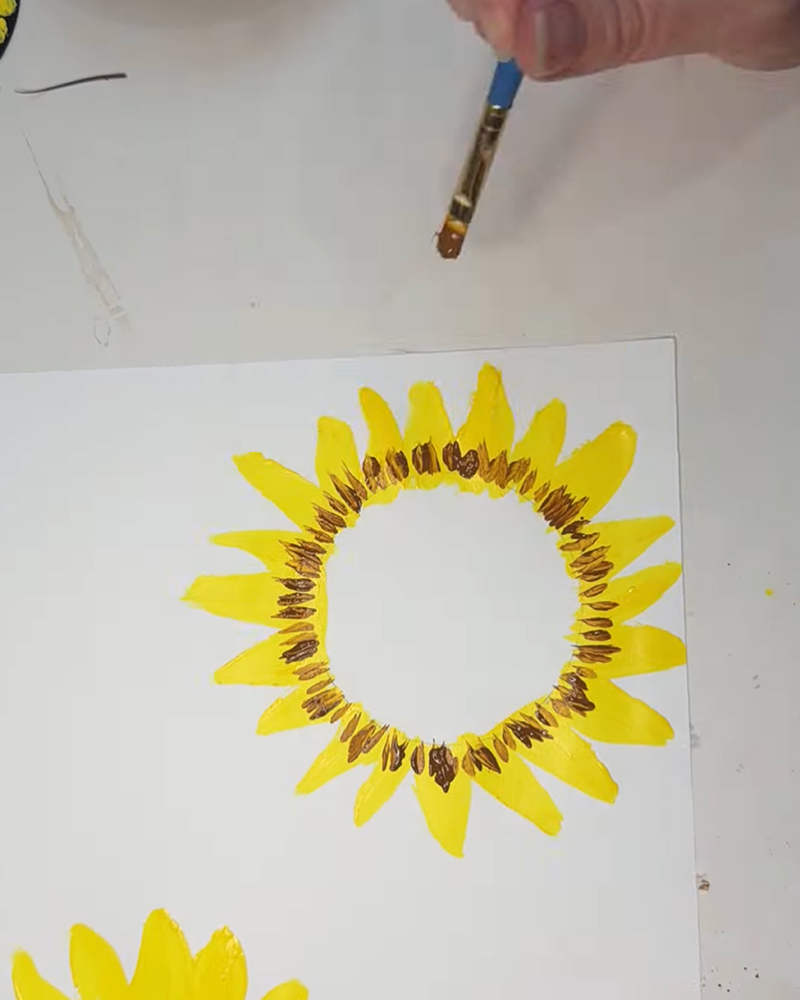
Step 5: Cut and Assemble the Sunflower
Once the paint is completely dry, cut around the outside shape of your sunflower.
Then glue your painted cardstock center into the middle.
At this point, your sunflower itself is finished, but we’re going to add one more layer.
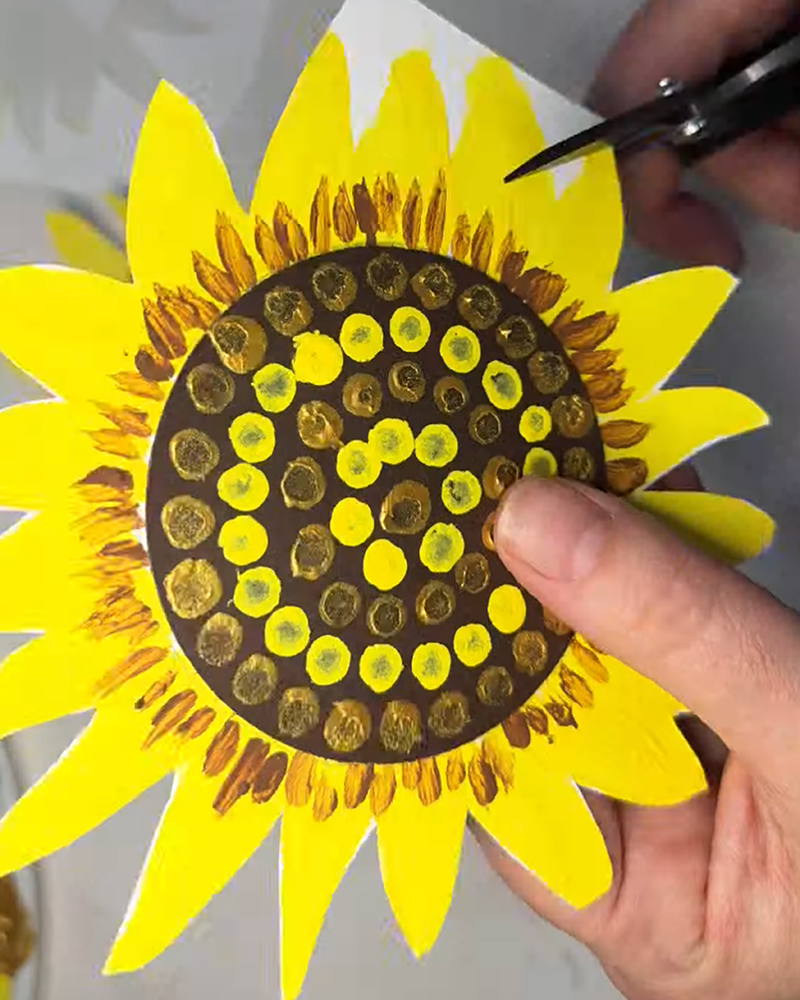
Step 6: Paint the Watercolor Background
On another piece of white heavyweight paper or cardstock, create a loose watercolor wash using greens and blues.
Think of it as an abstract background that might suggest sky, plants, leaves or earth behind the sunflower.
There’s no need to paint a specific scene. Let the watercolor blend, drip and move around the paper.
This is also a fun part of the project because we’re switching mediums. We started with acrylic paint, and now we’re adding watercolor.
Set the background aside and let it dry.
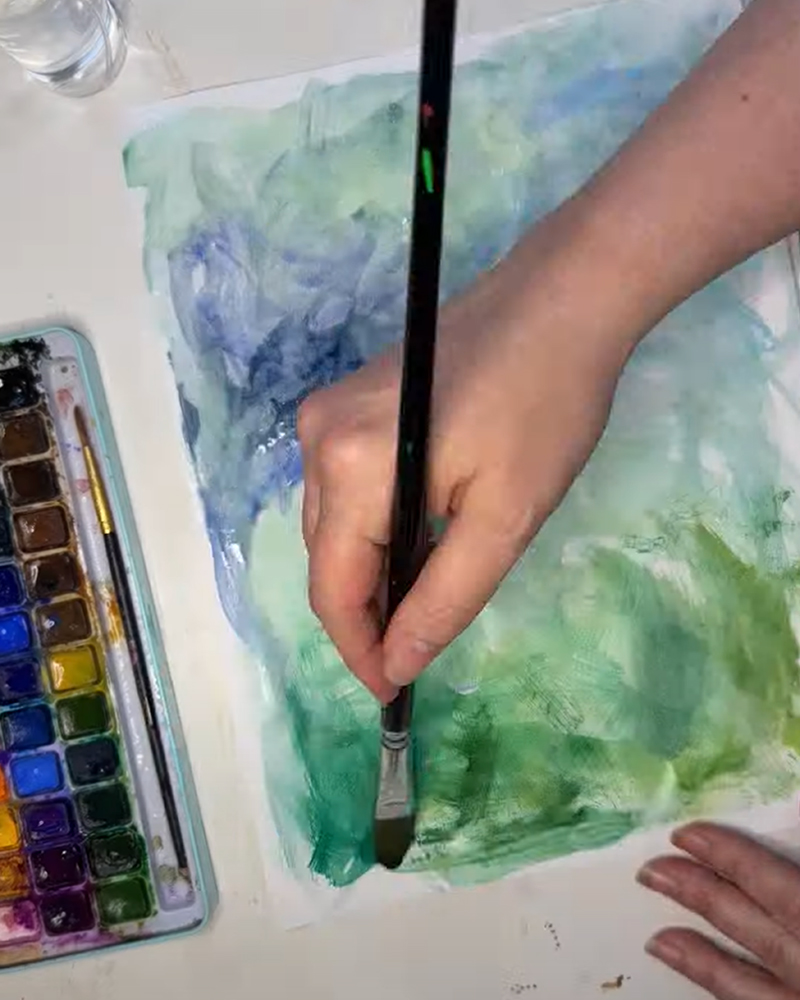
Step 7: Put It All Together
Once the watercolor background is dry, glue your completed sunflower onto it.
Then cut around the outside of the entire piece to create one larger circular artwork.
You can absolutely skip this last cutting step and leave the background rectangular, but I really like the way the finished project looks as one big circle.
What Can You Do With the Finished Sunflowers?
These would be adorable displayed together on a classroom wall, especially if every kid creates a different color pattern.
You could also glue one into an art journal, turn it into part of a larger mixed-media page, or make several and create an entire sunflower garden.
And if someone finishes early, just make another one.
Different colors, different patterns, different sizes. No two flowers have to look the same.
Watch the Painted Sunflower Come Together
I filmed myself making this project while I was testing it for class.
You can watch the process below and see how the different layers, textures, and colors come together.
Miss Jenny’s Art Class Notes
One thing I’m learning as I prepare to teach more art projects is that there is a difference between finding a project you love and figuring out how to teach it to a whole group of kids.
So before I bring a project into class, I want to test it myself.
For this one, I’ll be thinking about things like:
- How much time each section takes
- Which steps younger kids may need help with
- How much drying time we need
- Whether I should pre-cut or pre-draw anything
- How to set up paint so 20+ kids can work without complete chaos
- Which supplies can be shared
- Where kids can make their own creative choices
And yes, I fully expect the actual classroom version to teach me a few things I didn’t discover while peacefully making one sunflower by myself. 🙂
Make It Your Own
One of the things I want the kids in my classes to understand is that their art does not need to look exactly like mine.
- Try different colors.
- Make enormous petals.
- Use orange, pink, or purple instead of yellow.
- Change the background.
- Add leaves.
- Create three flowers instead of one.
- Cover the entire center in gold dots if that makes you happy.
The project gives us a starting point. What happens after that is where the fun begins.
More Art With Miss Jenny
This painted sunflower is just one of the projects I’m working on as I get ready for our homeschool art classes, and there are plenty more coming.
In the meantime, explore more Arts & Crafts projects, find something new in our Free Printables area, or browse the Holiday & Seasonal Activities section when you need an idea for your next creative day.
I’ll be sharing new projects here on Fusion Muse along with videos, supply lists, things I learned along the way, and plenty of behind-the-scenes creative mess.
Come Create With Us
Want more art projects, printables, creative ideas, and family fun?
Subscribe to Fusion Muse, and we’ll send new inspiration your way.
Because the best part of making something is deciding what we’re going to make next. 🌻

Jenny has a passion for learning and sharing what she learns. She has researched, written and published hundreds of articles on a wide variety of topics, including: SEO, art, design, marketing, ethics, business management, sustainability, inclusion, behavioral health, wellness and work-life balance.